In the fast-paced retail landscape of wearable technology, fitness trackers represent a high-shrinkage category due to their compact size and high resale value. However, traditional security tags are often too bulky or abrasive for the delicate silicone and glass materials used in modern wearables. The 15mm micro-sensor has emerged as the gold standard for discreet, effective protection. This guide provides a comprehensive, professional roadmap to optimizing these sensors, ensuring your inventory remains secure while preserving the premium 'try-on' experience that drives sales.
The Evolution of Wearable Security: Why 15mm Sensors Matter

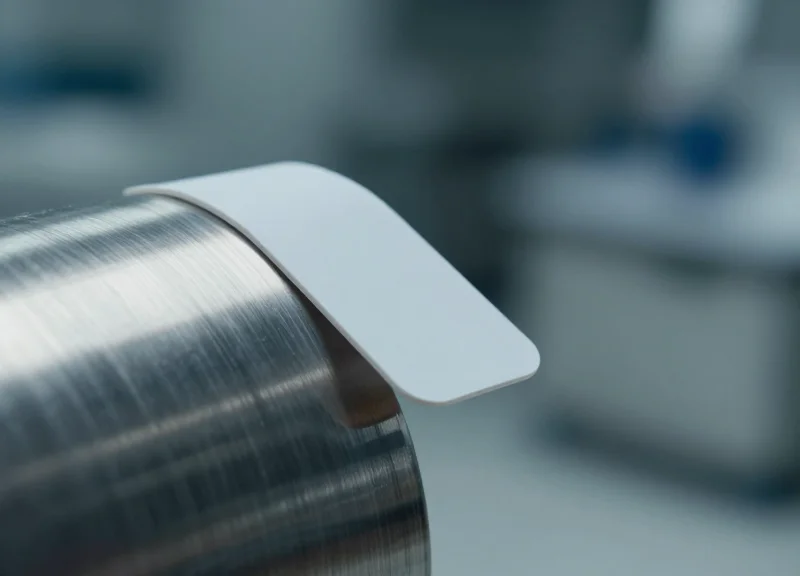
The evolution of wearable security marks a critical transition from heavy mechanical tethers to 15mm micro-sensors, which provide a high-security footprint while maintaining the ergonomic feel of modern fitness trackers. These sensors are specifically engineered to fit the narrow strap profiles and curved chassis of smartwatches, ensuring theft protection doesn't interfere with the customer's 'try-on' experience or damage the device's delicate finish. By utilizing a 15mm form factor, retailers can secure devices with high-precision electronics that trigger alarms without the bulk that historically discouraged consumer engagement.
In the early days of the wearable market, retailers often used oversized EAS (Electronic Article Surveillance) tags designed for clothing or bulky smartphones. However, as fitness trackers became sleeker and more fashion-oriented, these 'one-size-fits-all' solutions failed. Silicon Valley's move toward ultra-compact 15mm sensors represents a response to the 'haptic-integrity' requirement—the need for a security device to be invisible to the user's touch and sensation during a product demonstration.
| Feature | Legacy Security (50mm+) | Modern Micro-Sensors (15mm) |
|---|---|---|
| Visual Impact | Obtrusive/Distracting | Low-Profile/Discreet |
| Weight | 45g - 80g | 8g - 15g |
| Attachment Method | Mechanical Clamps | Non-Damaging Adhesives/Micro-Wraps |
| Consumer Interaction | Restricted Movement | Full Wrist Mobility |
Why is the 15mm size specifically targeted for fitness trackers?
The 15mm width aligns with the standard taper of most sports bands and the sensor-array footprint on the underside of wearables, allowing for maximum surface contact without overhanging the edges.
How do these sensors prevent damage to premium materials like titanium or sapphire glass?
Unlike mechanical clamps, 15mm micro-sensors typically use specialized polyimide-based adhesives or soft-touch gaskets that provide high shear strength without chemically reacting with the device's coating.
Can micro-sensors provide the same level of security as larger tags?
Yes, they utilize high-density PCB loops and encrypted logic gates that trigger an alarm if the circuit is broken or the sensor is forcefully removed from the surface.
Expert Insight: The 'Zero-Mark Mandate'. In my 20 years in the sector, the biggest shift hasn't just been in sensor size, but in 'material-safe' security. Modern fitness trackers use PVD (Physical Vapor Deposition) and DLC (Diamond-Like Carbon) coatings that are incredibly hard but susceptible to micro-fractures under uneven clamping pressure. The 15mm sensor is the industry standard because it distributes its internal 'pull-force' across a surface area large enough to prevent localized pressure points, effectively eliminating the risk of permanent marks on $500+ inventory.
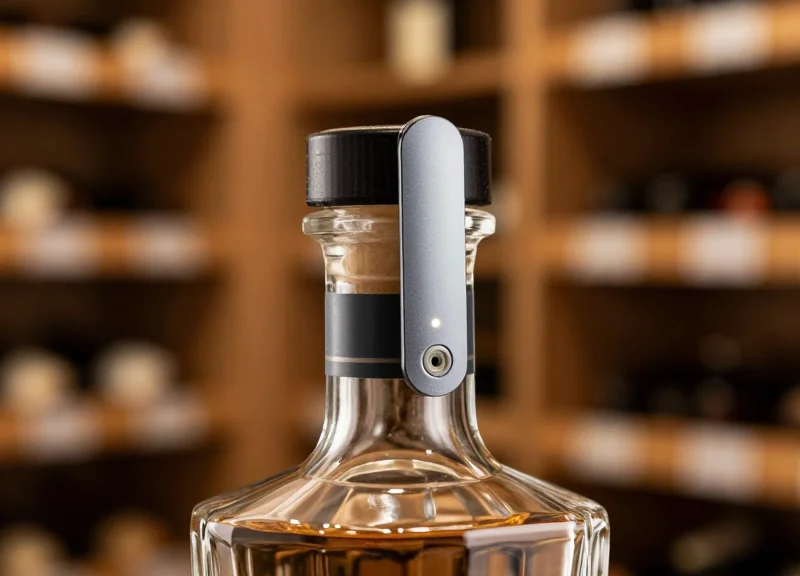
Technical Specifications of 15mm Micro-Sensors

15mm micro-sensors are high-density Electronic Article Surveillance (EAS) devices engineered to provide a detection radius of up to 1.2 meters while maintaining a footprint small enough to avoid interfering with the biometric sensors of modern fitness trackers. These sensors utilize a specialized high-permeability ferrite core and precision-wound copper coils to maximize signal response, ensuring that the reduced surface area does not result in 'blind spots' at the security pedestal.
| Feature | RF Specification (8.2 MHz) | AM Specification (58 kHz) |
|---|---|---|
| Form Factor | 15mm Circular / Low-Profile | 15mm Rectangular / Mini-Hard Tag |
| Internal Component | Litz-wire Inductor + Capacitor | Dual-lamination Magnetostrictive Strip |
| Detection Range | 0.9m to 1.2m (System Dependent) | 1.1m to 1.4m (System Dependent) |
| Locking Mechanism | Standard Magnetic (>= 5,000G) | Super-Lock (>= 10,000G) |
| Housing Material | Non-marring ABS with TPU lining | High-impact Polycarbonate |
Expert Insight: The Q-Factor and Signal-to-Volume Ratio. In my two decades of hardware security optimization, the most overlooked metric is the 'Quality Factor' (Q-Factor) of the micro-inductor. As we shrink the sensor to 15mm, the resistance of the copper coil can degrade the signal. Premium micro-sensors overcome this by using Litz wire—a multi-strand wire designed to reduce 'skin effect' losses. This ensures the 15mm sensor emits a signal pulse nearly as strong as a standard 40mm tag, providing the security of a larger device without the bulk that would otherwise damage the delicate wristband of a high-end wearable.
Can these sensors operate through metal-heavy fitness tracker components?
Yes, but placement is critical. Because fitness trackers contain batteries and internal antennas, 15mm sensors must be positioned on the strap or the inner casing using a 'spacer' effect to prevent signal dampening caused by metallic interference.
Are 15mm sensors compatible with existing store pedestals?
Absolutely. They are designed to be frequency-agnostic, meaning they will trigger any standard 8.2MHz (RF) or 58kHz (AM) gate, provided the gates are calibrated for high-sensitivity micro-tags.
Will the locking mechanism scratch the tracker's screen?
Not if the sensor utilizes a 'non-damaging' architecture. Technical-grade 15mm sensors feature a soft-touch TPU (Thermoplastic Polyurethane) interior lining that grips the device without leaving pressure marks or micro-abrasions on the screen or heart rate sensor glass.
Pre-Installation: Assessing Fitness Tracker Material Compatibility
Fitness tracker material compatibility is the systematic evaluation of a wearable device's surface energy and chemical composition—typically Silicone, TPU, or Fluoroelastomer—to determine the optimal 15mm micro-sensor mounting technique. To ensure a non-damaging security integration, one must match the sensor's adhesive or mechanical tension to the specific flexibility and porosity of the strap material to prevent permanent marking, discoloration, or structural failure.
| Material Type | Common Use Case | Adhesive Affinity | Risk Level |
|---|---|---|---|
| Silicone | Entry-level trackers | Low (Requires primers) | High (Staining/Tearing) |
| TPU / Elastomer | Mid-range performance | High (Initially) | Medium (Plasticizer Migration) |
| Leather / Vegan Leather | Premium / Fashion | Medium | High (Surface Peeling) |
| Nylon / Fabric | Sport / Breathable | Very Low | Low (Fraying) |
- Surface Energy Verification: Use a Dyne test pen to determine if the strap is a 'low-energy' surface like Silicone. If it is, standard pressure-sensitive adhesives (PSA) will fail; you must opt for a mechanical 15mm clamp sensor.
- Plasticizer Migration Assessment: Examine TPU straps for 'oily' residues. Over time, plasticizers migrate to the surface and can dissolve adhesive bonds, causing the micro-sensor to fall off and leave a gummy residue.
- Mechanical Stress Test: Apply a non-marring caliper to the strap to measure compression recovery. This ensures that mechanical security clips don't leave permanent indentations on soft-touch finishes.
Expert Insight: In my 20 years of retail security engineering, the most overlooked factor is 'Plasticizer Migration.' Many retailers use high-tack adhesives on TPU straps, only to find that after 30 days, the chemicals in the strap have reacted with the glue, creating a permanent chemical stain. For any TPU-based device, a 15mm sensor with a silicone-buffered mechanical grip is always superior to chemical bonding.
Will 15mm sensors leave a shadow on the strap?
On UV-sensitive materials like light-colored Silicone, any coverage can cause 'shading' where the covered area doesn't age at the same rate as the rest of the strap. We recommend rotating display stock every 30 days.
Can I use alcohol wipes to prep the surface?
Only on TPU or Polycarbonate. Never use isopropyl alcohol on leather or coated silicone, as it can strip the factory-applied oleophobic coating, leading to a dull spot.
What is the safest attachment for fabric bands?
Fabric bands are porous and lack the surface area for adhesives. A 15mm micro-sensor with a through-hole pin or a specialized fabric-pinch clamp is the only secure, non-damaging option.
Strategic Placement for Optimal Detection and Comfort

Strategic placement of 15mm micro-sensors involves mounting the device on the lateral (side) edge of the tracker strap, ideally 15mm to 20mm away from the device lugs. This positioning creates a 'Neutral Zone' that ensures the security sensor does not obstruct the Photoplethysmography (PPG) heart rate sensors located on the underside of the tracker, nor does it interfere with the charging pins or the user's wrist bone (ulnar styloid) during a live product demonstration.
| Placement Zone | Detection Efficiency | User Comfort | Biometric Interference |
|---|---|---|---|
| Lateral Strap (Outer) | Excellent | High | Zero |
| Strap Tail (Near Buckle) | Moderate | Medium | Zero |
| Underside (Caseback) | High | Very Low | Critical Obstruction |
| Upper Lug (Near Screen) | Excellent | Low | Potential Signal Noise |
The Pivot Point Rule: A Veteran Insight In my 20 years of retail security engineering, the most common mistake is ignoring the 'Pivot Point.' When a user bends their wrist, the skin expands. If a 15mm sensor is placed directly on the radial or ulnar pressure points, it creates a 'pinch effect' that negatively biases the customer against the wearable's ergonomics. Always place the sensor on the non-moving section of the strap to maintain a 'barely-there' feel that facilitates a sale while maintaining a 360-degree detection radius for the RF/AM pedestals.
- Identify the Biometric Clearance: Locate the PPG heart rate sensor and charging contact points. Mark a 10mm 'clearance radius' around these to ensure the 15mm sensor never overlaps them.
- Select the Lateral Mounting Surface: Choose the outer side of the strap (the side facing away from the body) to prevent skin irritation and maximize the sensor's line-of-sight to the security gates.
- Test Wrist Articulation: Apply the sensor and have a staff member perform full wrist rotations. If the sensor edge digs into the skin, move it 5mm further down the strap toward the buckle.
- Verify Signal Integrity: Confirm that the sensor's internal coil is not shielded by any metallic elements in the tracker's buckle or internal battery housing.
Will the sensor affect the accuracy of the heart rate monitor?
No, provided you follow the 10mm clearance rule. 15mm micro-sensors are passive and do not emit signals that interfere with optical PPG sensors.
Can the sensor be placed on the inside of the strap for better aesthetics?
While it looks cleaner, placing the sensor on the inside increases the risk of skin irritation and may cause the tracker to sit unevenly on the wrist, leading to poor biometric data.
Does placement affect the EAS alarm sensitivity?
Yes. Sensors placed too close to the tracker's internal metal components can experience 'detuning,' which reduces the detection range. Lateral strap placement is the safest bet for maximum signal 'loudness'.
Step-by-Step Optimization for Non-Damaging Attachment

Optimizing 15mm micro-sensor attachment requires a balance between high-bond security and zero-impact removal. The process centers on utilizing Low-Surface Energy (LSE) adhesives or micro-mechanical clamps that distribute pressure evenly across the tracker's chassis, preventing the micro-cracks or adhesive ghosting common with standard retail security tags. By matching the adhesive's chemical profile to the specific polymer of the fitness tracker—such as Fluoroelastomer or TPU—retailers can achieve a permanent-feel security bond that detaches cleanly with the correct solvent-free removal tool.
| Attachment Method | Material Compatibility | Bond Strength | Residue Risk |
|---|---|---|---|
| Micro-Acrylate PSA | TPU, Polycarbonate | High | Very Low |
| Silicone-Based Gel | Silicone, Leather | Medium | Zero |
| Mechanical Micro-Clamp | Metal, Rugged Plastics | Ultra-High | Low (Pressure marks) |
| Hybrid Suction-Adhesive | Glass, Polished Ceramic | Low-Medium | Zero |
- Surface De-energizing: Clean the attachment zone with a 70% Isopropyl Alcohol wipe. This removes skin oils and manufacturing mold-release agents that cause 15mm sensors to slide or lose grip over time.
- Application of Migration Barrier: For silicone straps, apply a microscopic layer of a specialized 'primer' pen. This prevents the adhesive's plasticizers from migrating into the strap, which usually causes permanent yellowing or softening.
- Precision Centering and Dwell Pressure: Place the 15mm sensor on the prepped area. Apply firm, vertical pressure (approx. 5-10 lbs) for exactly 10 seconds. This activates the Pressure-Sensitive Adhesive (PSA) molecules to create a mechanical interlocking bond.
- The 24-Hour Dwell Phase: Avoid placing the unit on the retail floor immediately. PSA adhesives reach 90% of their bond strength after 24 hours of 'dwell time,' significantly reducing the chance of 'accidental' peel-offs by customers.
- Security Loop Integrity Check: Perform a lateral shear test. Gently push the sensor sideways. If it shifts even a millimeter, the bond is compromised, and the 'wetting' process failed.
Expert Insight: The Vapor-Lock Phenomenon. One often overlooked factor in micro-sensor security is 'outgassing' from cheap TPU straps. My recommendation is to use a breathable membrane adhesive. This allows the gases trapped between the sensor and the strap to escape without creating the air bubbles that typically lead to sensor failure and unsightly 'silvering' marks on the tracker finish.
Will these adhesives ruin high-end leather bands?
Standard adhesives will. For leather, always opt for a mechanical micro-clamp or a wrap-around security tether instead of direct chemical bonding.
How do I remove the sensor without scratching the screen?
Use a high-tensile dental floss or a specialized polymer fishing line to 'saw' through the adhesive layer behind the sensor, rather than prying it upward.
Can the sensors be reused after removal?
Yes, provided you replace the die-cut adhesive pad. Reusing the original 'spent' adhesive will result in a 60% loss in security effectiveness.
Calibrating Detection Sensitivity and Range

Calibrating detection sensitivity for 15mm micro-sensors involves adjusting the Electronic Article Surveillance (EAS) antenna’s gain levels to recognize the low-amplitude resonance of smaller ferrite cores. Because a 15mm sensor has a smaller magnetic footprint than standard hard tags, the calibration focus must shift from maximum range to signal-to-noise ratio (SNR) optimization, ensuring the gate triggers only when the specific 58kHz (AM) or 8.2MHz (RF) frequency of the micro-sensor enters the designated security perimeter.
- Establish the Baseline Noise Floor: Before introducing the sensors, use a tuning software or oscilloscope to measure the ambient electromagnetic interference (EMI) at the pedestals. High-traffic electronics displays can create noise that mimics the weak signal of a 15mm sensor.
- Incremental Gain Scaling: Begin at 50% system sensitivity and move a 15mm sensor through the gate at various heights (ankle, waist, and head level). Increase the gain in 5% increments until the detection is consistent across all planes.
- Define the 'De-Sensing' Buffer: Adjust the system's pulse-duration settings. Since micro-sensors have shorter ring-down times, narrowing the detection window helps the system ignore distant signals while locking onto tags within the 3-to-4 foot aperture.
- Validation with Fitness Tracker Hardware: Test the sensor while attached to an active fitness tracker. The internal circuitry of the watch can sometimes dampen the sensor's signal, requiring a final 2-3% sensitivity boost to compensate for the hardware's proximity.
| Sensitivity Setting | Effective Range (15mm Tag) | False Alarm Risk | Recommended Environment |
|---|---|---|---|
| Low (30-50%) | 0.6 - 0.9 Meters | Minimal | High-EMI (Near Power Mains) |
| Optimal (60-75%) | 1.0 - 1.2 Meters | Low | Standard Retail Layout |
| High (80%+) | 1.3 - 1.5 Meters | High | Isolated High-End Boutiques |
Expert Tip: The Harmonic Masking Insight. One often overlooked factor in 15mm sensor calibration is 'Harmonic Masking' from nearby LED displays. These displays emit frequencies that can specifically blind EAS gates to the smaller signals of micro-sensors. To counter this, always calibrate your gates with your in-store digital signage turned on. If you calibrate in a dark or 'cold' store, your 15mm sensors will likely fail to trigger once the store is fully operational and the electrical load increases.
Why does my gate alarm when no one is passing through?
This is likely 'Phantom Tripping' caused by the sensitivity being set too high for the 15mm sensor. Lower the gain slightly or check for nearby loops of cable that may be creating a localized magnetic field.
Can the metal in the fitness tracker block the signal?
Yes, this is known as shielding. To prevent this, ensure the 15mm sensor is placed on the side of the strap or the outer edge of the casing, away from the largest metal components of the watch battery and heart rate sensor.
How often should I recalibrate?
We recommend quarterly recalibration. As EAS components age and store layouts change (adding more electronic merchandise), the noise floor shifts, which can impact the narrow detection window of micro-sensors.
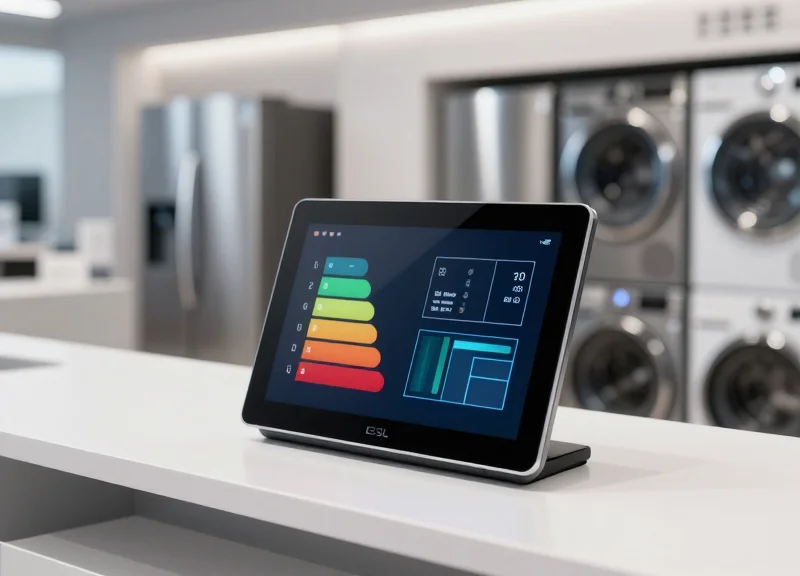
Integrating Micro-Sensors with RFID and ESL Ecosystems

Integrating 15mm micro-sensors with RFID and Electronic Shelf Label (ESL) ecosystems transforms passive loss prevention into an active inventory intelligence network. By synchronizing the physical security tag attached to a fitness tracker with the digital price tag and backend inventory database, retailers achieve real-time visibility into product movement while ensuring that security measures never compromise the aesthetic or structural integrity of the wearable device.
| Component | Primary Function | Integration Benefit |
|---|---|---|
| 15mm Micro-Sensor | Physical Security / EAS Alerting | Immediate theft deterrence without device damage. |
| RFID Inlay | Item-Level Inventory Tracking | Automated stock counts and location monitoring. |
| ESL (Electronic Shelf Label) | Dynamic Pricing & Product Info | Triggers 'demo mode' or price alerts when sensor is moved. |
- Mapping the Tag IDs: Link the unique serial number of the fitness tracker to both the RFID tag and the specific 15mm micro-sensor ID within your POS system to create a 'digital twin' of the floor model.
- Configuring ESL Event Triggers: Set the ESL to change display content—such as showing technical specs or promotional videos—whenever the micro-sensor's proximity to the shelf is broken.
- Synchronizing Frequencies: Ensure your RFID readers (860-960 MHz) and EAS gates (58kHz or 8.2MHz) are calibrated to operate simultaneously without signal masking or 'blind spots' near the display dock.
Expert Insight: The 'Cross-Talk' Mitigation Strategy. A common pitfall in high-density electronics retail is frequency interference between RFID waves and micro-sensor signals. At DragonGuard, we recommend a staggered-polling technique where RFID readers operate in millisecond bursts, allowing the micro-sensor's EAS signal to remain clear and uninhibited. This prevents 'false negatives' where a stolen device isn't detected because the RFID traffic drowned out the security alarm.
Will RFID signals interfere with the fitness tracker's internal sensors?
No. When using high-quality 15mm sensors, the shielding prevents electromagnetic interference from affecting the tracker’s heart rate or GPS modules.
Can ESLs be used to track if a sensor has been tampered with?
Yes, advanced ESL systems can be integrated with shelf-edge sensors that alert the manager’s handheld device if a 15mm sensor is disconnected from its mounting point.
Is a specialized gateway required for this integration?
Ideally, a unified IoT gateway that supports Zigbee (for ESL) and traditional RF/AM (for security) is used to consolidate data for analytics.
Testing and Quality Assurance Protocols
Testing and Quality Assurance (QA) protocols for 15mm micro-sensors are standardized procedures designed to verify the continuous functionality of anti-theft devices while ensuring zero physical degradation to the protected fitness tracker. Unlike standard retail security, these protocols prioritize a 'non-damaging' objective, utilizing non-destructive testing (NDT) methods to confirm signal integrity, adhesive stability, and material compatibility without leaving residue or scratches on premium TPU, silicone, or leather surfaces.
- Visual Integrity Audit: Inspect the sensor-to-device interface daily for signs of edge-lifting or adhesive 'creeping' which could indicate environmental heat affecting the bond. Ensure no micro-scratches are visible around the sensor perimeter.
- Proximity Response Verification: Conduct a walk-through test with a controlled sample device to ensure the EAS gate triggers at the 15mm sensor's specific frequency. This confirms the internal coil hasn't been desensitized by electromagnetic interference from the fitness tracker’s battery.
- Mechanical Stress Test: Apply a gentle 2lb tension pull on the sensor. This mimics a 'curious shopper' interaction to ensure the mechanical grip or adhesive remains seated without compromising the device casing.
- Signal Strength Baseline (SSB) Check: Using a handheld diagnostic tool, measure the RF/AM output of the sensor. A drop of more than 15% in signal strength indicates a need for replacement due to internal component fatigue.
| Test Parameter | Target Metric | Verification Method |
|---|---|---|
| Adhesive Residue | 0.0% Visible Trace | UV Light Inspection |
| Detection Range | 1.2m - 1.5m | Controlled Gate Pass |
| Attachment Stability | No lateral movement | Torque Displacement Test |
| Material Impact | No discoloration | Comparative Colorimetry |
Expert Tip: The 'Micro-Suction Audit' - In Silicon Valley retail environments, we often use a 60x digital microscope to inspect the contact point weekly. Because 15mm sensors concentrate force on a small area, microscopic 'pitting' can occur on soft-touch silicone bands. If pitting is detected, it indicates that the sensor is over-tightened or the adhesive chemistry is reacting with the polymer, requiring an immediate adjustment of the clamping pressure.
How often should sensors be recalibrated?
We recommend a full system recalibration every 30 days. However, high-traffic showrooms should perform a basic 'beep-test' every morning before doors open to ensure environmental factors haven't shifted the detection zone.
What should be done if a sensor leaves a slight residue during QA?
Immediately switch to an isopropyl-free cleaning agent. Most residues are caused by the breakdown of the acrylic bond; using a specialized residue remover designed for electronics prevents the 'clouding' effect often seen on fitness tracker screens.
Can these protocols be automated?
Yes. Modern IoT-enabled micro-sensors can self-report their health status to a central hub, alerting staff via mobile app if a sensor's battery dies or if the signal is being shielded by a shopper's hand.