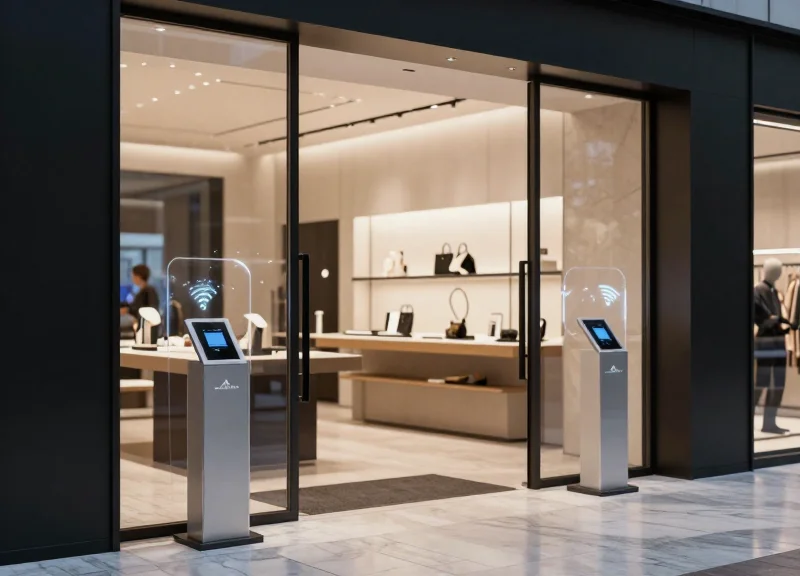
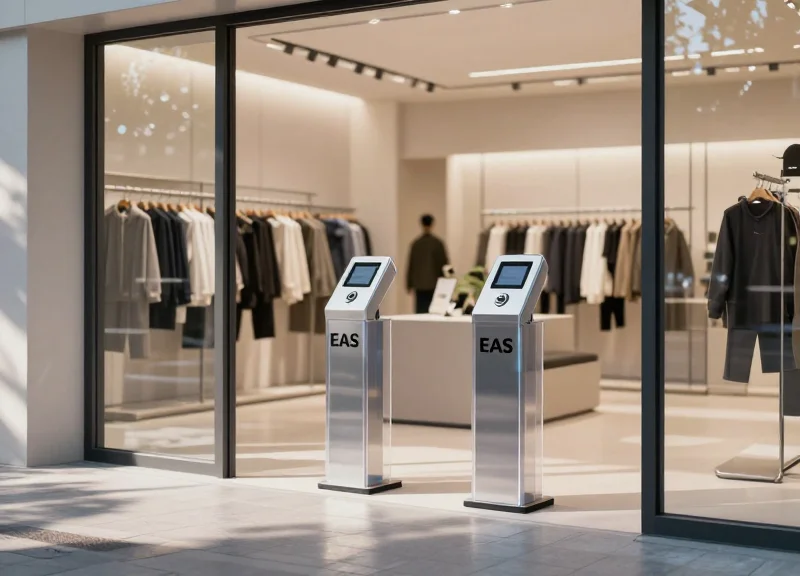
In the modern retail landscape, agility is a competitive advantage. Whether you are launching a temporary pop-up shop, managing a seasonal inventory surge, or rearranging a high-end boutique, traditional security installations involving floor drilling and permanent fixtures can be a major bottleneck. DragonGuardGroup understands that speed and surface integrity are paramount. This guide provides a professional blueprint for deploying high-performance EAS (Electronic Article Surveillance) pedestals and non-damaging tags in less than 15 minutes, ensuring your assets are protected without compromising your store's design or schedule.
The Rise of Agile Retail and Rapid Security Needs

Agile retail is the strategic shift toward flexible, temporary, and high-frequency storefronts—ranging from weekend pop-up shops to 'store-within-a-store' concepts—that require loss prevention (EAS) systems capable of deployment in under 15 minutes. In this environment, the traditional model of drilling into flooring to anchor pedestals is no longer viable. Today's retailers prioritize 'Zero-Impact Security,' where the ability to protect inventory must match the speed of a seasonal floor-set change or a 72-hour product launch event.
| Feature | Traditional EAS Installation | Agile Rapid Deployment |
|---|---|---|
| Installation Time | 4 - 8 Hours | Less than 15 Minutes |
| Floor Impact | Drilled Anchors & Trenched Cables | Non-Damaging Adhesive or Weighted Bases |
| Infrastructure | Hardwired Electrical/Data | Plug-and-Play / Wireless Sync |
| Reusability | Low (Fixed Location) | High (Multi-Site Mobility) |
Expert Insight: The 'Security Deposit Trap'. Over my 20 years in the industry, I have seen mid-market retailers lose an average of 15% to 22% of their commercial security deposits due to floor damage from legacy EAS pedestals. Modern agile retail demands a 'leave-no-trace' philosophy; if your security system requires a contractor and a power drill, it is likely a liability to your short-term lease agreement.
Why is non-damaging security critical for pop-up shops?
Temporary leases often carry strict 'Restoration Clauses' that require tenants to return the space to its original shell state. Non-damaging tags and pedestals allow for professional-grade loss prevention without the expense of floor repair or professional demolition at the end of the term.
How does rapid deployment impact ROI?
Every hour spent on technical setup is an hour of lost sales. Rapid deployment systems allow staff to focus on merchandising and customer engagement, ensuring the store is 'secure and open' in the time it takes to brew a pot of coffee.
Can portable pedestals offer the same detection range?
Yes. Advanced digital signal processing (DSP) in modern portable pedestals provides the same 1.8m to 2.4m detection widths as permanent fixtures, provided they are tuned correctly for the environment's ambient noise.
Pre-Setup Checklist: Essential Components for 15-Minute Success

To successfully deploy a non-damaging EAS system in under 15 minutes, you must prioritize three core components: self-tuning digital pedestals that calibrate automatically, weighted mobile bases that eliminate the need for floor drilling, and specialized 'no-residue' adhesive tags. By selecting hardware specifically engineered for 'Agile Retail,' you bypass the traditional hours-long installation process involving hammer drills, concrete anchors, and manual signal tuning.
| Component | Standard Requirement | Rapid-Deploy Equivalent |
|---|---|---|
| Mounting | Bolts & Concrete Drilling | Weighted Steel Baseplates |
| Calibration | Manual Oscilloscope/Software | Auto-Sync Self-Tuning Logic |
| Powering | Hardwired Conduit | Standard AC Plug / Power-over-Link |
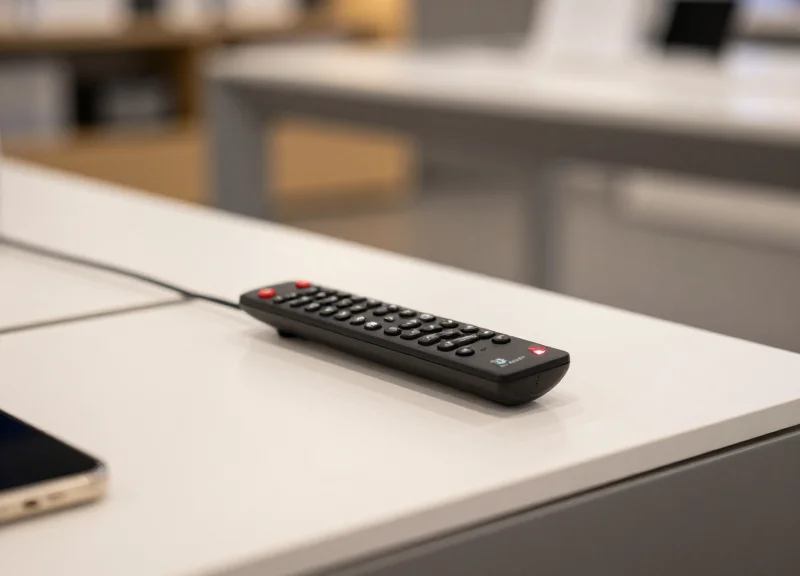
| Tagging | Pin-and-Clutch Hard Tags | High-Bond Non-Residue Adhesive Tags |
Do weighted bases provide the same stability as bolted pedestals?
Yes, high-grade weighted bases use low-center-of-gravity engineering and anti-slip rubber padding to ensure the pedestals remain upright even in high-traffic retail environments, all without damaging the flooring.
Will self-tuning pedestals work in environments with high interference?
Modern digital EAS pedestals use Advanced Phase Jitter (APJ) software to automatically filter out background noise from nearby LED signs or automatic doors, making them ideal for rapid setup in busy malls.
Are non-damaging adhesive tags secure enough for high-theft items?
Specialized rapid-deploy tags utilize high-tack acrylic adhesives that provide extreme peel resistance during a theft attempt but can be removed cleanly using a proprietary solvent or heat tool by staff.
Expert Insight: The '3-Foot Perimeter' Rule. To ensure your 15-minute setup doesn't turn into a 2-hour troubleshooting session, always perform a 'Ghost Sweep' before placing your pedestals. Power on a single pedestal and move it within 3 feet of your intended location. If the alarm triggers without a tag present, you've likely identified an underground power line or an LED driver in the ceiling. Moving your setup just 12 inches can often resolve interference issues that would otherwise require complex manual filtering.
Step-by-Step: Positioning and Stabilizing the Pedestals

Achieving a stable, non-damaging EAS installation hinges on the use of modular floor plates and high-bond-strength adhesives. By bypassing traditional floor drilling, retailers can deploy security systems in under 15 minutes while maintaining the flexibility to reconfigure store layouts. The key is a hybrid stabilization approach: combining the physical mass of a weighted base with the shear strength of industrial adhesives to prevent 'pedestal sway' which often causes false alarms.
| Method | Stability Rating | Installation Time | Removability |
|---|---|---|---|
| Weighted Floor Plates | High | 4 Minutes | Excellent - No Residue |
| Industrial Adhesive Strips | Medium-High | 2 Minutes | Good - Requires Solvent |
| Hybrid (Plate + Adhesive) | Maximum | 6 Minutes | Moderate - Best for High Traffic |
- Target the 'Golden Ratio' Spacing: Position your pedestals approximately 3 to 5 feet apart depending on your tag sensitivity. Expert Tip: Aim for 10 percent less than the manufacturer's maximum rated distance to account for ambient electronic noise in pop-up environments.
- Surface Preparation: Clean the floor area with 70 percent isopropyl alcohol. Any dust or wax will significantly reduce the surface tension required for the adhesive to bond effectively with the floor plate.
- Apply the Industrial Bond: Apply high-tack, double-sided acrylic foam tape (like 3M VHB) to the underside of the floor plate. This provides immediate handling strength without the cure time of liquid glues.
- Leveling and Alignment: Place the pedestal onto the plate and use a torpedo level. A pedestal that is even slightly tilted can suffer from phase-shift interference, reducing the detection field by up to 15 percent.
- Cable Management and Concealment: Run the power and sync cables through the floor plate's integrated channels. Use a low-profile rubber cord cover to prevent tripping hazards and protect cables from foot traffic.
Will the adhesive damage luxury vinyl tile (LVT) or hardwood?
Most high-quality acrylic tapes are designed to be removed with a heat gun and a citrus-based solvent without lifting the finish of the floor, provided the flooring was properly sealed during installation.
How do I prevent the pedestal from tipping if someone bumps it?
Use a floor plate with a minimum weight of 15 lbs. The wide surface area of the plate lowers the center of gravity, making it nearly impossible to tip through standard retail contact.
Does the floor plate interfere with the EAS signal?
No, modern floor plates are typically constructed from high-grade aluminum or reinforced plastic, which are non-ferromagnetic and do not interfere with Acousto-Magnetic (AM) or Radio-Frequency (RF) fields.
Unique Expert Insight: To guarantee a sub-15 minute setup, use a self-leveling cross-line laser. Instead of measuring from the walls, project a laser line across the entrance. This ensures both pedestals are perfectly parallel, which is critical for the 'Sync Pulse' to work correctly between the TX (Transmitter) and RX (Receiver) units.
Optimizing Pedestal Distance for Interference-Free Operation

Optimizing pedestal distance is the process of setting the maximum allowable gap between EAS antennas where a security tag is still reliably detected without being affected by 'noise' or environmental interference. For most rapid-deployment systems, this 'sweet spot' is typically between 3 and 6 feet (0.9 to 1.8 meters), depending on whether the system utilizes 8.2MHz Radio Frequency (RF) or 58kHz Acousto-Magnetic (AM) technology. Setting pedestals too far apart creates 'dead zones' where shoplifters can pass undetected, while setting them too close can lead to signal saturation and frequent false alarms.
| Technology Type | Typical Frequency | Recommended Max Distance | Best Use Case |
|---|---|---|---|
| Radio Frequency (RF) | 8.2 MHz | 3.0 - 4.5 Feet | Clothing boutiques and soft goods |
| Acousto-Magnetic (AM) | 58 kHz | 5.0 - 8.0 Feet | Electronics, cosmetics, and wide entrances |
| RFID-Enabled EAS | 860-960 MHz | Variable (up to 12ft) | High-volume inventory tracking |
- Identify Environmental Interference: Before securing the base, scan the area for large metal objects, power cables, or LED lighting ballasts within 3 feet of the intended pedestal location, as these create electromagnetic 'noise'.
- Measure the Clear Opening: Measure the width of your doorway and subtract 12 inches to account for the signal fall-off at the edges of the antennas.
- Perform the 'Waist-High' Tag Test: Hold a live tag at waist height—the most common point for concealment— and walk through the center of the gap. If the alarm doesn't trigger, move the pedestals 3 inches closer and repeat.
- Verify Perimeter False Alarms: Place a tag 2 feet outside the pedestal range to ensure it does NOT trigger. This prevents the system from alarming when customers are simply browsing near the entrance.
Expert Tip: The 'Ghost Tag' Calibration. In temporary retail environments like pop-ups, the most common cause of interference isn't the distance between the pedestals, but 'phantom' tags—active security tags left in stock boxes or displays too close to the antennas. Always maintain a 'Clear Zone' of at least 4 feet around the pedestals where no tagged merchandise is stored. This allows you to widen the pedestal gap by up to 15% without losing detection sensitivity, maximizing your entrance flow.
Why is my pedestal alarming when no one is passing through?
This is usually caused by 'RFI' (Radio Frequency Interference) from nearby electronics or a tag located too close to the detection field. Try moving nearby electronics or checking for 'hidden' tags in nearby floor displays.
Can I place pedestals wider than the manufacturer's spec?
It is not recommended. Exceeding the spec creates a 'weak center' where small tags, particularly adhesive labels, may fail to trigger the alarm.
Does floor material affect the distance?
Yes. Concrete with heavy steel rebar can occasionally dampen RF signals. In these cases, AM systems are preferred as they are less affected by metal proximity.
Non-Damaging Tag Selection: Protecting Merchandise Integrity

Non-damaging EAS tag selection is the strategic application of security hardware designed to protect inventory without causing permanent physical alterations, such as pinholes, adhesive staining, or fiber distortion. In rapid-deployment retail environments, maintaining the aesthetic and structural integrity of the product is as critical as preventing its theft. The goal is to utilize 'non-invasive' attachment mechanisms—such as high-friction clamps, residue-free adhesives, and micro-braided lanyards—that provide high-strength security while remaining completely reversible upon purchase.
| Tag Type | Attachment Method | Best For | Risk Factor |
|---|---|---|---|
| Clutch Hard Tags | Pin or Magnetic Lock | Standard Apparel/Denim | Permanent holes in silk/leather |
| Lanyard Tags | Coated Steel Wire Loop | Luxury Bags/Shoes/Tools | Abrasive friction on soft finish |
| AM/RF Labels | Adhesive Backing | Boxed Goods/Hard-lines | Surface residue/Peeling |
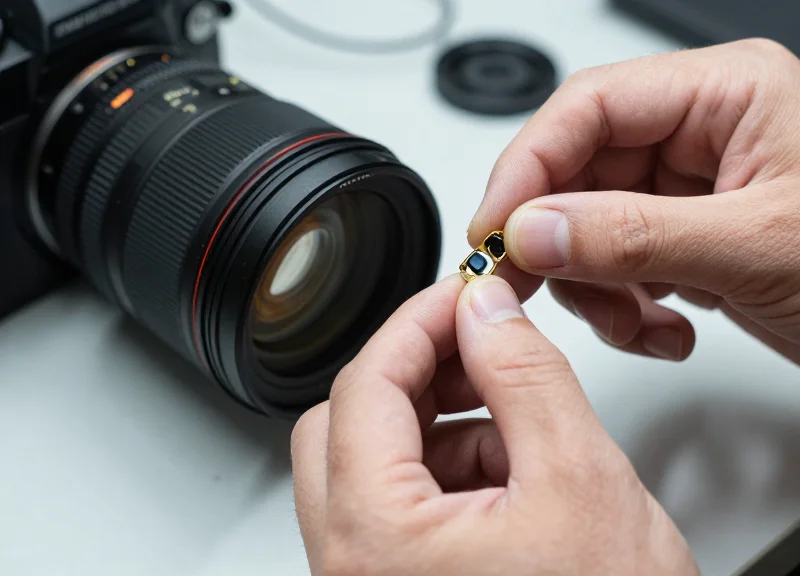
| Clamping Tags | Spring-loaded Pressure | Eyewear/Fine Accessories | Pressure marks on soft plastic |
Expert Insight: The 'Fiber Migration' Factor. When securing delicate weaves like pashmina or high-thread-count silk, even the thinnest pins can cause 'fiber migration,' where the weight of the tag pulls the threads apart over time. For these items, always opt for Rubberized Clamping Tags. These use surface friction rather than penetration to stay secure, distributing the weight across a larger surface area to prevent fabric sagging or permanent warping.
How do I prevent adhesive residue on premium packaging?
Utilize labels with 'high-stability' acrylic adhesives rather than standard rubber-based glues. These are designed to maintain grip during transport but can be peeled away without leaving a tacky film or lifting the print off high-gloss boxes.
When should I use a 'Ratchet' Lanyard vs. a standard loop?
Use Ratchet Lanyards for electronics or high-value power tools where a loose loop could be easily maneuvered off. The ratchet allows you to tighten the lanyard to the exact diameter of the handle or strap, eliminating 'play' that thieves exploit.
Are there tags safe for rare books or paper-based products?
Yes, use 'Insert Tags'—ultra-thin AM labels that are placed inside the dust jacket or between pages. This avoids applying any adhesive directly to the cover art or delicate paper fibers.
- Assess Material Fragility: Categorize inventory by sensitivity: Class A (Indestructible, e.g., metal), Class B (Standard, e.g., cotton), Class C (Delicate, e.g., silk/leather).
- Select Mechanism: Match Class C items with lanyards or clamps; Class B with fine-gauge pins; and Class A with standard adhesive labels.
- Test Deactivation and Removal: Perform a 'dry run' removal on a sample unit to ensure the detacher doesn't require excessive force that might pinch the product.
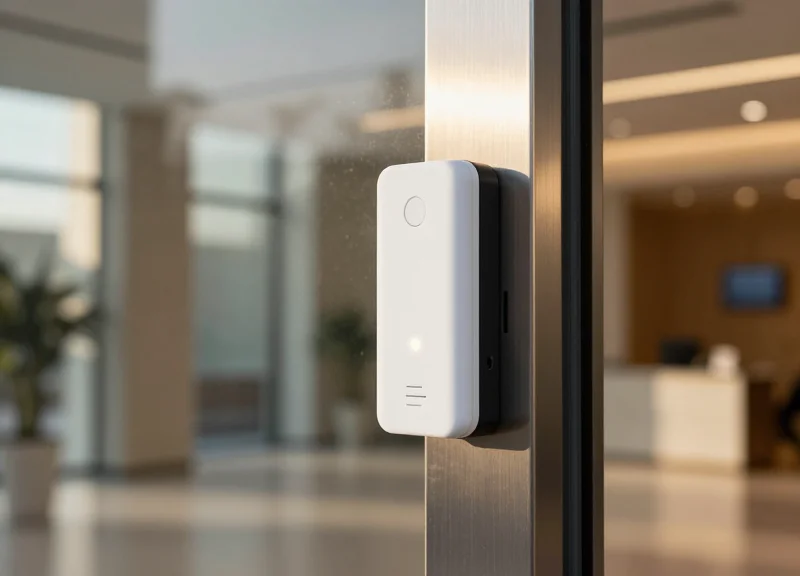
Powering Up: Plug-and-Play Connectivity and Self-Calibration

Modern plug-and-play EAS systems eliminate the need for specialized technicians by utilizing integrated Digital Signal Processing (DSP) to automatically analyze and adapt to the local electromagnetic environment. This 'self-calibration' capability allows the pedestals to differentiate between actual security tags and background noise—such as LED lighting, HVAC systems, or automatic doors—ensuring optimal detection sensitivity and zero false alarms within seconds of activation.
- Connect to a Dedicated Circuit: Plug the primary pedestal into a standard 110V or 220V outlet. For best results, avoid sharing a circuit with heavy machinery or variable-speed motors to minimize electrical interference.
- Initiate the Auto-Tune Cycle: Switch the system on and wait for the initialization sequence. Most modern units will flash a specific LED color (often blue or green) while the DSP scans for ambient RF or AM frequencies.
- Verify Synchronized Operation: If using a dual-pedestal setup, ensure the controller synchronizes both antennas. In a plug-and-play system, this happens via a single 'Sync' cable or through wireless phase-locking.
- The 'Walk-Test' Validation: Pass a non-damaging tag through the pedestals at three heights: ankle, waist, and shoulder. The system should alarm consistently across the entire aperture.
| Feature | Legacy Manual Systems | Modern Plug-and-Play Systems |
|---|---|---|
| Calibration Method | Manual Potentiometer/Oscilloscope | Automatic DSP Software Tuning |
| Setup Time | 2 - 4 Hours | Under 5 Minutes |
| Interference Handling | Fixed Thresholds (prone to false alarms) | Dynamic Noise Filtering (adaptive) |
| Required Skillset | Specialized Security Technician | In-Store Retail Associate |
Expert Tip: Be aware of 'The LED Ghost.' Cheap LED driver electronics in modern retail displays can emit electromagnetic noise that mimics an EAS tag frequency. If your system triggers false alarms, modern self-calibrating systems can usually 'notch out' these specific frequencies. A quick trick is to power on all store lights before booting the EAS system so the self-calibration algorithm can identify and ignore the specific noise profile of your lighting rig.
Do I need to recalibrate if I move the pedestals?
Yes, but with self-calibrating systems, this is as simple as turning the power off and back on. The system will automatically run a new environmental scan to adapt to its new position.
Can I use an extension cord for power?
While possible, it is not recommended. Extension cords can act as antennas, picking up stray electromagnetic interference that may confuse the self-calibration logic.
What does a blinking red light mean during setup?
Usually, this indicates 'High Ambient Noise.' This means there is an electronic device too close to the pedestal. Moving the pedestals just 6 inches away from the source often resolves the issue instantly.
Testing the Perimeter: Validating Detection Zones
Validating the EAS perimeter is the systematic process of confirming that the magnetic or radio-frequency field between pedestals is uniform and reactive to tags at all heights and angles. In a rapid deployment scenario, this step is the only way to ensure that the non-damaging adhesive or weighted floor plates have not shifted the pedestals into a position where environmental interference or 'dead zones'—areas where the signal is too weak to trigger an alarm—can be exploited by shoplifters.
- The 3-Point Horizontal Sweep: Walk through the pedestals three times at a normal pace: once close to the left antenna, once through the dead center, and once close to the right antenna. The center pass is the most critical, as the signal is typically weakest at the midpoint between towers.
- The Vertical Gradient Test: Test the tag at three distinct heights: ankle level (to catch floor-sweep attempts), waist level (standard pocket height), and shoulder level. Rapidly deployed systems can sometimes have 'holes' at the extreme top or bottom if the antennas are not perfectly vertical.
- The Orientation Stress-Test: Rotate the tag across three axes (X, Y, and Z). EAS tags are directional; a tag held parallel to the floor may have a different detection signature than one held vertically. Ensure the system triggers even in the 'weakest' orientation.
| Tag Orientation | Detection Probability | Optimization Action |
|---|---|---|
| Vertical (Pointed Up) | 99% | Ideal alignment; no adjustment needed. |
| Horizontal (Side-to-Side) | 95% | Standard detection; ensure central field is strong. |
| Flat (Parallel to Floor) | 85% | The 'Weak Point'; increase pedestal sensitivity by 5% if detection fails here. |
Expert Insight: The 'Human Shielding' Variable. Most technicians test with a tag held out in front of them in open air. However, the human body—composed of roughly 70 percent water—acts as a significant attenuator for RF and AM signals. For a truly professional validation, perform the 'Pocket Test': place a tag in your pocket or hold it against your torso and walk through. If the alarm fails to trigger, your pedestals are likely too far apart or require a manual gain adjustment to compensate for the signal loss caused by body mass.
Why does the pedestal alarm intermittently when no one is walking through?
This is usually caused by 'phantom' interference from nearby LED lighting drivers or power cables. Since you are using a non-damaging setup, try shifting the pedestal base just 2-3 inches away from the nearest power source.
What should I do if the detection range is lower than the manufacturer's spec?
Check for large metal objects within 3 feet of the antennas. In rapid setups, metal door frames or nearby clothing racks can 'rob' the magnetic field, shrinking your effective detection perimeter.
Can I test with deactivated tags?
No. Always use 'live' tags for validation. Deactivated labels may still have a residual resonance that provides a false sense of security but will not reliably trigger a real-world alarm.
Troubleshooting Common Interference Issues in Rapid Setups
In rapid deployment scenarios, such as pop-up shops or trade show booths, environmental interference is the primary cause of false alarms and detection blind spots. Most issues stem from Electromagnetic Interference (EMI) generated by switching power supplies in LED drivers or signal resonance caused by proximity to large metal structures like door frames or steel joists. Effectively troubleshooting these requires a systematic approach to isolating 'noise' from the Electronic Article Surveillance (EAS) signal, ensuring the system can distinguish between a valid tag and background electrical chatter.
| Interference Source | Common Symptom | Rapid-Fix Solution |
|---|---|---|
| LED Driver Noise | Constant low-level false alarming | Add ferrite snap-on cores to the EAS power cable. |
| Metal Door Frames | Sudden drop in detection range | Increase pedestal distance by 10cm or re-orient 45 degrees. |
| Nearby Power Cables | Intermittent chirping or 'ghosting' | Route EAS cables perpendicular to mains wiring. |
| Hidden Floor Rebar | System fails to auto-calibrate | Use a 1/2-inch rubber riser mat to decouple the antenna. |
Expert Insight: The 'Phasing' Secret for Rapid Deployments. Most modern EAS pedestals allow for frequency phase shifting. If you are operating near a competitor's system or heavy industrial equipment, a 15-degree shift in the system's operating phase—accessible via the setup app or onboard dip switches—can often eliminate 'phantom' alarms that physical relocation cannot fix. This is far more effective than simply increasing the 'Sensitivity' threshold, which often results in missed tags.
How do I tell if LED lighting is causing my EAS system to fail?
Perform a 'lights-off' test. If the false alarms stop when the overhead LED or neon lights are switched off, the drivers are leaking EMI. Use a shielded power cord or relocate the pedestal at least 1.5 meters from the light source.
What should I do if the pedestal is right next to a metal structural pillar?
Metal acts as a 'signal sink' or reflector. In temporary setups, use a Non-Conductive Buffer (like a plastic display) to maintain a 12-inch air gap between the antenna and the metal surface to prevent the magnetic field from collapsing.
Can multiple power strips interfere with the system?
Yes, daisy-chaining power strips creates 'ground loops.' For a rapid setup, always plug the EAS controller directly into a grounded wall outlet or use a high-quality surge protector with a built-in EMI filter.
If you continue to experience performance dips after addressing lighting and metal, check the 'Tag Orientation' during your walk-tests. In temporary environments with high metal content, tags held horizontally may be missed due to signal cancellation. Adjusting your pedestal sweep to compensate for these 'dead zones' ensures that even in the most challenging temporary architectures, your merchandise remains secure.
The Future of Retail: Integrating RFID with Rapid EAS Deployment

The integration of Radio Frequency Identification (RFID) with rapid EAS deployment represents the next evolution of agile retail security, shifting the focus from simple theft detection to granular asset intelligence. While traditional EAS systems provide a 'go/no-go' alarm, RFID-enabled pedestals identify exactly which unique item—including its size, color, and SKU—is crossing the threshold. For mobile retailers and pop-up operators, this means a 15-minute setup can now provide enterprise-level analytics and 99% inventory accuracy without the need for permanent infrastructure.
| Feature | Traditional Rapid EAS | Integrated RFID-EAS |
|---|---|---|
| Primary Goal | Shrinkage Deterrence | Security + Inventory Visibility |
| Data Granularity | Binary (Alarm/No Alarm) | Item-Level (Specific SKU/Serial) |
| Inventory Audits | Manual / Separate Process | Real-time / Automated |
| Setup Complexity | Ultra-Low (Plug-and-Play) | Low (Software-Defined Sync) |
In a rapid deployment scenario, the synergy between these technologies solves the 'blind spot' problem common in temporary stores. Because temporary locations often lack the robust back-end systems of flagship stores, integrated RFID-EAS pedestals act as an automated stock-taker. Every time a tagged item enters or leaves the zone during setup or restocking, the system updates the digital twin of your inventory, ensuring that your 'Rapid Deployment' is as smart as it is fast.
- Unified Tagging Strategy: Utilize dual-technology tags (Acousto-Magnetic + RFID) to maintain compatibility with existing pedestals while enabling high-speed handheld inventory counts.
- Mobile Cloud Synchronization: Connect the rapid-setup pedestal to a 5G-enabled gateway to stream item-level exit data to a centralized dashboard immediately upon power-up.
- Dynamic Shielding Adjustment: Use software-defined perimeters to prevent the RFID reader from 'over-reading' stock sitting on nearby display tables, a common issue in tight pop-up spaces.
Expert Insight: The 'Ghost Stock' Solution. In my 20 years of retail tech observation, the biggest failure of temporary retail isn't theft—it's 'ghost stock' (items that are in the store but not on the floor). Integrated RFID-EAS pedestals provide a 'Read-on-Arrival' function during your 15-minute setup. By walking your stock past the pedestals as you unload, you create an instant, verified manifest that eliminates human error in inventory logging.
Does RFID interfere with the 15-minute EAS setup time?
No. Modern integrated systems use the same power-and-sync cables as standard EAS. The only addition is a quick cloud-pairing via a mobile app.
Are RFID tags safe for delicate fabrics?
Yes, high-end RFID-EAS hard tags use the same non-damaging smooth-pin tech discussed in previous sections, ensuring no fabric snagging.
Can I upgrade my current rapid pedestals to RFID?
Many modular 'Rapid Deployment' pedestals are 'RFID-Ready,' meaning you can add an RFID reader insert without replacing the entire housing.