Protecting high-value fragile models presents a unique challenge for retailers: balancing loss prevention with product preservation. Traditional stickers often leave residue or damage surfaces, diminishing the item's value. Enter 58KHz non-marking soft labels—the 'invisible shield' that provides top-tier Acoustic-Magnetic (AM) security without compromising aesthetics. In this guide, we explore the technical nuances of applying these labels to ensure your delicate inventory remains both safe and pristine.
The Science of 58KHz Acoustic-Magnetic (AM) Technology for Retail
 Technology for Retail")
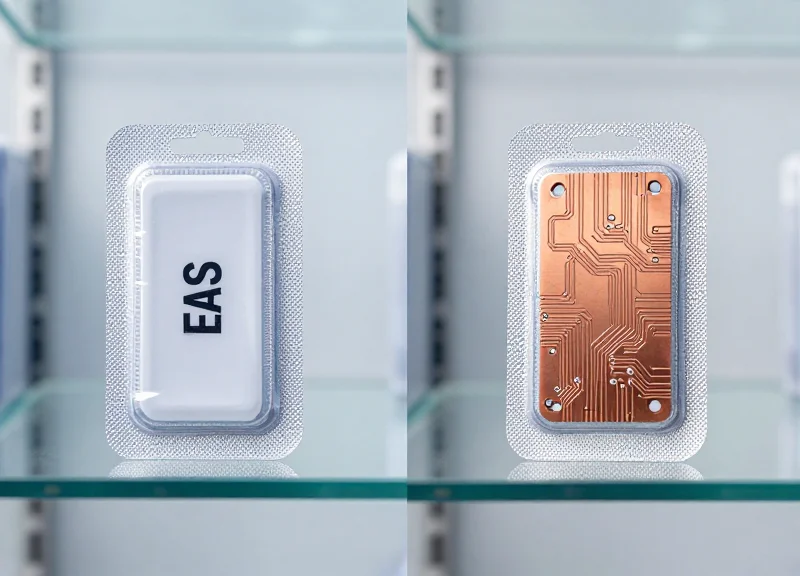
58KHz Acoustic-Magnetic (AM) technology is a sophisticated Electronic Article Surveillance (EAS) system that utilizes the principle of magnetostriction to secure inventory. Unlike standard Radio Frequency (RF) systems, AM technology operates by emitting a periodic magnetic pulse at 58,000 cycles per second. This pulse causes the amorphous metal strips inside the non-marking soft label to mechanically vibrate or 'resonate.' When the pulse ends, these strips continue to oscillate, generating a unique magnetic signal that is captured by the receiver antennas. This pulse-and-echo mechanism allows for superior detection ranges and an exceptionally low rate of false alarms, making it the premier choice for protecting high-value, fragile items.
| Feature | AM Technology (58KHz) | RF Technology (8.2MHz) |
|---|---|---|
| Detection Accuracy | Ultra-High (Pulse/Echo Signature) | Moderate (Frequency Sweep) |
| Interference Resistance | High (Immune to LED/Neon noise) | Low (Susceptible to electronic noise) |
| Deactivation Distance | Up to 10-15cm (Non-contact) | Near-contact only |
| Material Compatibility | Works through liquid and near metal | Blocked by foil and liquids |
Why is 58KHz the gold standard for fragile models?
The 58KHz frequency is far less likely to be blocked by the complex materials or metallic paints often found in high-end hobbyist models, ensuring consistent protection without requiring bulky hardware.
Does AM technology affect electronic components?
No. The low-frequency 58KHz pulse is non-ionizing and operates at a magnetic field strength that is safe for internal circuitry in most consumer electronics and model motors.
What is the 'Tag-on-Tag' advantage?
AM technology is unique because it resists 'tag-on-tag' shielding, meaning even if multiple labeled items are stacked closely together, the 58KHz resonance remains detectable.
Expert Insight: The High Q-Factor Advantage. In my two decades of experience in retail tech, the true differentiator for 58KHz is the 'Quality Factor' or Q-Factor of the amorphous ribbon. A high Q-factor means the label stores energy more efficiently and rings longer after the transmitter pulse stops. For fragile models, this allows us to use much smaller, thinner 'Invisible Shield' labels that don't compromise the aesthetic of the piece but still trigger an alarm from over two meters away—a feat nearly impossible with standard 8.2MHz RF tags.
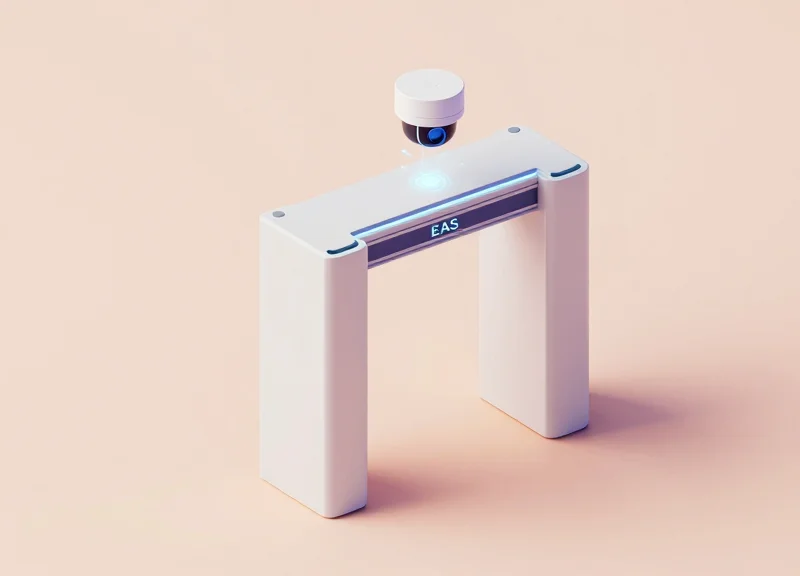
- Field Excitation: The pedestal transmitter creates a 58KHz magnetic field zone.
- Mechanical Resonance: The soft label's internal strips expand and contract physically at the same frequency.
- Signal Decay Detection: The system listens for the 'ring down' signal during the quiet intervals between pulses, confirming a valid tag presence.
Why 'Non-Marking' Adhesive is Critical for High-Value Collectibles

For high-value collectibles, the physical integrity of the surface is the primary driver of market valuation. Non-marking 58KHz soft labels are engineered with high-cohesion synthetic acrylic polymers that provide a secure physical bond without the chemical cross-linking associated with standard adhesives. While traditional security labels often use rubber-based hot melts that 'weld' to surfaces over time, non-marking variants are designed to maintain a stable, low-energy interface that allows for clean removal months or even years after application without lifting paint or leaving a ghosting residue.
| Property | Standard Security Adhesive | Non-Marking AM Adhesive |
|---|---|---|
| Base Polymer | Rubber-based Hot Melt | Micro-sphere Acrylic |
| Adhesion Type | High Initial Tack | Controlled Peel Strength |
| Long-term Effect | Oxidation and Yellowing | UV Stable and Clear |
| Removal Outcome | Solvent usually required | Clean peel / Zero residue |
| Material Safety | Low (May damage resins) | High (Safe for plastics/paints) |
Expert Insight: The hidden danger in model security isn't just the sticky residue; it's a phenomenon known as 'Plasticizer Migration.' Generic adhesives often contain volatile oils that act as solvents. When applied to PVC or resin models, these oils migrate into the model's surface, causing the plastic to soften, discolor, or become permanently tacky. Professional-grade non-marking labels utilize a 'barrier-layer' chemistry that prevents this molecular exchange, ensuring the underlying material remains chemically inert.
Is 'non-marking' less secure for retail?
No. While the peel strength is lower for removal, the shear strength—the resistance to sliding—remains high, ensuring the label stays in place during handling and only comes off when intentional, perpendicular force is applied.
Will it react with hand-painted finishes?
Non-marking adhesives are formulated to be pH-neutral. Unlike acidic adhesives that can eat into delicate acrylic paints used in model kits, these labels sit on top of the surface tension layer without penetrating the pigment.
How long can the label stay on safely?
In climate-controlled environments, premium non-marking labels are rated for 24+ months of application without adhesive transfer, whereas standard labels may begin to 'bond' permanently within 6 months.
Essential Tools and Environment for Precision Labeling

To successfully apply 58KHz non-marking soft labels to fragile models, you must operate within a 'Goldilocks' environment: a climate-controlled setting where the ambient temperature is maintained between 18°C and 24°C (64°F–75°F) and humidity remains below 50%. This precision environment ensures that the non-marking adhesive reaches its optimal tackiness without becoming overly fluid or brittle, while minimizing the risk of dust entrapment that could compromise both the security signal and the aesthetic finish of the model.
| Environmental Factor | Optimal Range | Impact on 58KHz Labels |
|---|---|---|
| Ambient Temperature | 18°C - 24°C | Prevents adhesive 'creeping' and ensures immediate bond strength. |
| Relative Humidity | 40% - 50% | Reduces static electricity; prevents moisture film on model surfaces. |
| Lighting Conditions | 500+ Lux (Cool White) | Enables detection of micro-fractures or surface contaminants before application. |
| Air Quality | HEPA Filtered / ISO Class 8 | Eliminates airborne particulates that create 'bubbles' under the soft label. |
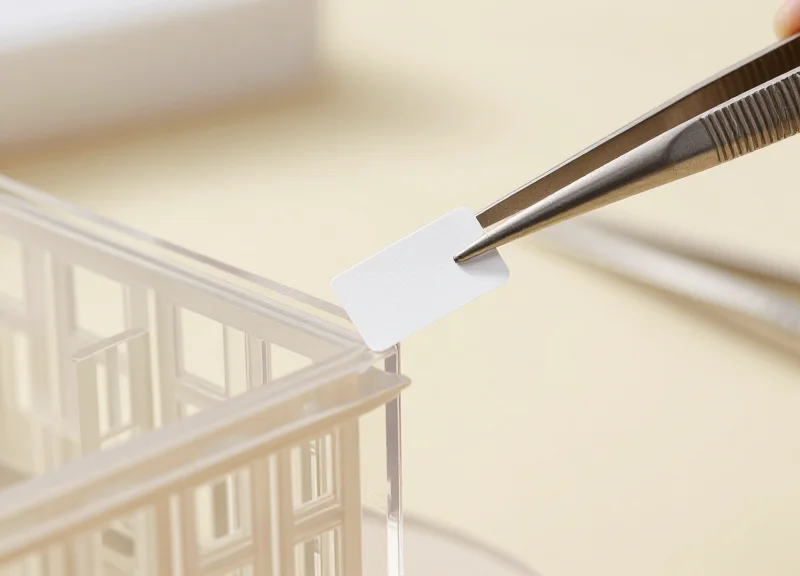
Beyond the environment, the physical toolkit used for application determines the 'invisible' nature of the shield. Standard metal tweezers are strictly forbidden as they can scratch delicate resin or interfere with the AM (Acoustic-Magnetic) internal resonators. Instead, professionals utilize specialized non-conductive, non-marring tools designed for high-end electronics and archival work.
- ESD-Safe Carbon Fiber Tweezers: These provide the grip needed to position labels with sub-millimeter accuracy without generating static that attracts dust.
- Deionized Air Blower: Essential for removing surface particulates from the model's crevices without physical contact or introducing moisture from breath.
- Isopropanol (99% Purity): Used for 'spot-cleaning' the specific application site to remove oils; 99% purity is required to ensure zero residue or solvent damage to paints.
- High-CRI LED Task Lamp: A high Color Rendering Index (CRI) light source reveals the exact texture of the model, helping to hide the label in natural shadows or contours.
Expert Tip: The 'Surface Energy Check'. Before applying a batch of labels to a new model material (like a specific 3D-printed resin), perform a water-bead test. If water beads up tightly, the surface energy is low, and you should allow the label a full 24-hour 'dwell time' in the controlled environment to achieve maximum adhesion before the model is handled or placed near high-traffic retail vibration.
Can I apply labels in a standard retail stockroom?
Only if the stockroom is climate-controlled. Fluctuating temperatures in non-insulated areas can cause the non-marking adhesive to fail prematurely or leave a 'shadow' on the model's surface.
Why is dust such a significant problem for 58KHz labels?
Even a single speck of dust creates a microscopic air gap. For non-marking adhesives, this gap acts as a lever point where the label can begin to peel, potentially snagging on a customer's hand or clothing.
Surface Preparation: Cleaning and Testing Fragile Materials
Surface preparation for high-value fragile models is the process of neutralizing microscopic contaminants—such as skin oils, release agents from the manufacturing mold, and atmospheric particulates—to optimize the surface energy for the label's adhesive. Unlike standard retail tagging, preparing fragile surfaces for 58KHz non-marking labels requires a 'low-impact' cleaning strategy that prioritizes the structural integrity of paint, decals, and delicate resins over aggressive chemical bonding.
| Cleaning Agent | Material Compatibility | Risk Level | Evaporation Rate |
|---|---|---|---|
| 70% Isopropyl Alcohol (IPA) | Most plastics, unpainted resins | Low | Fast |
| Distilled Water | Water-based paints, decals | Very Low | Slow |
| Heptane-based Cleaners | Metals, solvent-resistant resins | Moderate | Very Fast |
| Electronic Grade Duster | All materials (dry cleaning) | Zero | N/A |
- The Patch Test: Before full application, apply a drop of your chosen cleaning agent to an inconspicuous area (like the underside of the base). Wait 60 seconds and wipe with a microfiber cloth to check for pigment transfer or surface softening.
- Primary De-Dusting: Use an anti-static brush or a burst of compressed air to remove loose particles. Mechanical friction from a cloth on a dusty surface can cause micro-scratches on high-gloss finishes.
- Solvent Application: Moisten a lint-free wipe with the solvent—never spray directly onto the model. Use a single-direction wipe motion to lift contaminants rather than swirling them around.
- Flash-Off Period: Allow the surface to 'outgas' or dry completely for at least 30 seconds. Applying a label over trapped solvent vapors can lead to adhesive failure or long-term bubbling.
Expert Tip: The 'Gloved Static' Phenomenon. In my 20 years of technical retail consulting, I have observed that many technicians use latex gloves, which can generate significant static electricity during the cleaning process. This static charge doesn't just attract dust; it can actually interfere with the initial 'tack' of the 58KHz soft label. Always use powder-free nitrile gloves and an anti-static wrist strap when preparing high-end collectibles to ensure a pristine, neutral surface for the non-marking adhesive to grab onto.
Will 70% IPA damage the paint on my model?
Most factory-applied acrylic and enamel paints are resistant to short-term IPA exposure, but hand-painted models or those with 'weathering' effects may bleed. Always perform the Patch Test first.
How do I know if the surface is 'clean enough'?
The surface should appear 'dead matte' or consistently glossy without any rainbow-like sheen (which indicates oil residue) when viewed under a 5000K light source.
Can I use household glass cleaner?
No. Most glass cleaners contain ammonia or detergents that leave a microscopic film behind, which acts as a release agent and prevents the non-marking label from bonding securely.
The 'Soft Touch' Technique: Pressure-Sensitive Application Protocols

The 'Soft Touch' technique is a professional-grade application protocol designed to secure 58KHz non-marking soft labels onto delicate substrates by utilizing multi-point pressure distribution. Unlike standard retail labeling, this method focuses on achieving maximum adhesive wet-out—the process where the adhesive flows into the surface microscopic valleys—without applying concentrated mechanical stress that could cause structural failure or hairline fractures in fragile model components.
- The 'Hover and Align' Phase: Hold the label by its edges using anti-static tweezers. Position it approximately 2mm above the target area to verify alignment. Avoid any contact until the position is perfect, as non-marking adhesives can lose their 'clean-release' properties if repositioned multiple times.
- Initial Point Contact: Lower the label until the center point makes contact. Do not press down yet. Allow the label to sit under its own negligible weight to establish a primary bond, which prevents the label from sliding during the high-pressure phase.
- Radial Pressure Distribution: Using a soft silicone micro-roller or a gloved finger, apply pressure starting from the center and moving outward in a starburst pattern. This 'Radial Outward' movement ensures that air is evacuated from the interface, preventing 'silvering' or air bubbles that could compromise the 58KHz signal.
- Edge Sealing (The Perimeter Pass): Run a fine-tipped burnishing tool or your fingernail (covered by a microfiber cloth) along the extreme perimeter of the label. This creates a secondary seal that prevents edge-lifting, which is the primary cause of labels snagging and damaging the model during handling.
| Material Type | Max Recommended Pressure | Application Tool | Structural Risk |
|---|---|---|---|
| Thin Resin/3D Print | Low (2-3 PSI) | Soft Silicone Tip | High: Surface Cracking |
| Injection Molded Plastic | Medium (5-7 PSI) | Microfiber-wrapped Finger | Moderate: Flexion Stress |
| Die-Cast Metal | High (10+ PSI) | Rubber Roller | Low: Paint Compression |
Expert Tip: Utilize the 'Counter-Pressure Anchor.' When applying a label to a protruding part of a model, always place your opposite hand directly behind the application site to act as a mechanical ground. This ensures that the pressure you apply is absorbed by your own hand rather than being transmitted through the model’s joints or weak points, effectively neutralizing the risk of a snap.
How do I know if I've applied enough pressure?
Visual inspection is key. A properly applied non-marking label will appear uniform in color. If you see 'mottled' or lighter spots under the label, the adhesive hasn't fully bonded. Apply targeted pressure to those areas until the visual density is consistent.
Can I apply labels to curved surfaces using this technique?
Yes, but you must use the 'Divide and Conquer' approach. Secure the center line of the label along the apex of the curve first, then work the sides down slowly to avoid creating creases that could interfere with the 58KHz ferrite core inside the label.
What is the 'Dwell Time' for these labels?
While the bond is immediate, non-marking adhesives typically require a 24-hour 'dwell time' to reach peak stabilization. Avoid testing the bond strength or subjecting the model to extreme temperature shifts during this window.
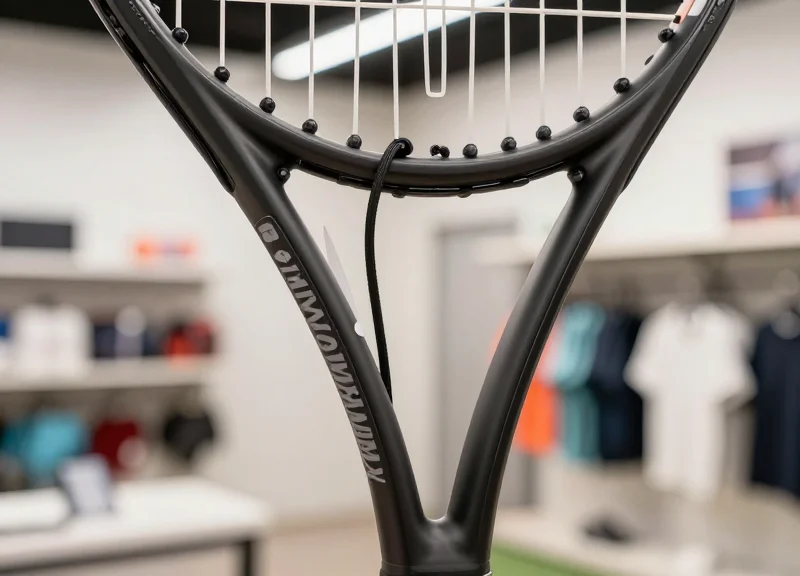
Strategic Hidden Placement: Enhancing Security Without Hiding Detail

Strategic hidden placement involves the precise positioning of 58KHz non-marking soft labels within a model's 'occlusion zones'—such as hollow bases, interior chassis cavities, or concave undersides—to ensure the security tag remains invisible to collectors while staying within the 1.5 to 2.0-meter resonant detection range of Electronic Article Surveillance (EAS) pedestals. Successful placement requires balancing the depth of the hide against the electromagnetic attenuation caused by the model's material density to prevent 'blind spots' at the store exit.
| Placement Zone | Aesthetic Impact | Signal Integrity | Best For |
|---|---|---|---|
| Hollow Base/Plinth | Zero Visibility | Optimal (Direct Path) | Statues and Dioramas |
| Internal Cockpit/Cabin | Low Visibility | Variable (Density Dependent) | Vehicles and Aircraft |
| Under-carriage Recess | Hidden from Primary Angles | Excellent | Mecha and Robotics |
| Removable Components | Zero Visibility | Moderate (Potential Shielding) | Modular Kits |
When hiding labels, the primary technical challenge is Acousto-Magnetic (AM) signal attenuation. Unlike RFID, 58KHz AM technology relies on the mechanical vibration of two metallic strips inside the label. If the label is compressed too tightly into a cavity or surrounded by high-density resin, the 'ringing' frequency can be dampened, leading to a failure to trigger the alarm. Always ensure a 0.5mm clearance around the label's top surface to allow for this micro-vibration.
How does metallic paint affect hidden labels?
Metallic or pearlescent paints often contain aluminum or copper flakes that can create a localized Faraday cage effect. If a model is heavily coated in metallic finish, avoid internal placement; instead, utilize the underside of the base where paint thickness is usually minimal.
What is 'Orientation Bias' in hidden placement?
58KHz labels are dipolar. For maximum detection, the long axis of the label should ideally be vertical when the model passes through pedestals. If you must hide a label horizontally, ensure the model is displayed in a way that its exit path aligns the label's length with the pedestal's magnetic field lines.
Can labels be placed near magnets?
No. Many high-end models use rare-earth magnets for swappable parts. Placing a 58KHz soft label within 3cm of a magnet will de-tune or permanently deactivate the label's internal resonators, rendering it useless for security.
Expert Tip: The 15-Degree Offset Rule. In my two decades of optimizing retail security for high-value tech, I have found that the most effective hidden placement is not perfectly flat. By angling the label at a 15-degree tilt relative to the model’s main axis, you increase the 'cross-sectional capture' of the EAS field. This ensures that regardless of whether the collector carries the model upright or tilted in a bag, at least one of the label's internal resonators will reach the excitation threshold required to trigger the pedestal alert.
Testing Signal Strength: Ensuring Maximum Detection Accuracy

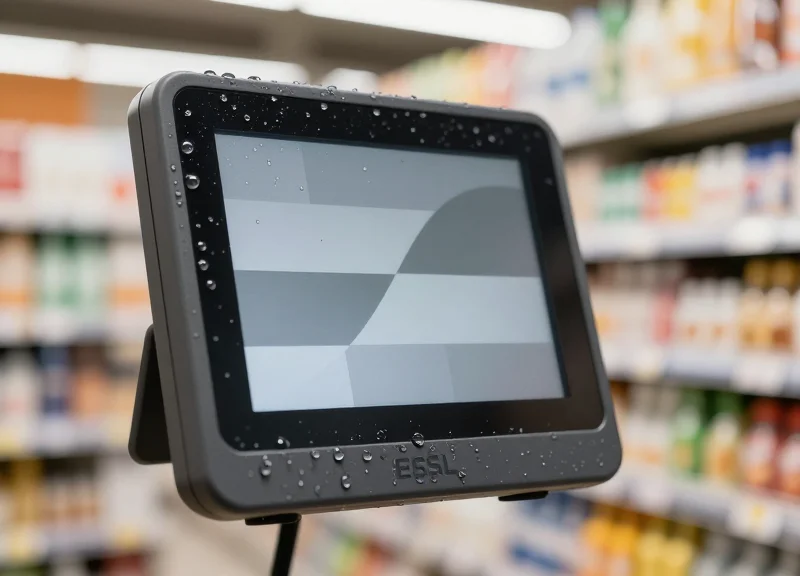
Testing signal strength is the technical process of measuring the resonance amplitude of a 58KHz Acousto-Magnetic (AM) label to ensure it triggers Electronic Article Surveillance (EAS) pedestals at a distance of 1.2 to 2.0 meters. Unlike simple pass/fail testing, professional signal verification uses a field strength meter to identify how the model's material composition and label orientation affect the 'Q-factor' (quality factor) of the label's internal resonator, preventing 'silent' shoplifting incidents caused by weak signal emission.
| Label Orientation | Signal Efficiency | Detection Reliability | Best Use Case |
|---|---|---|---|
| Parallel to Pedestals | 95-100% | Maximum | Side-mounted placement on large scale models |
| Horizontal (Flat) | 75-85% | High | Baseplate or internal chassis application |
| Perpendicular to Pedestals | 40-60% | Moderate/Variable | Narrow vertical surfaces; requires dual-pedestal coverage |
- Calibrate the Field Tester: Power on your 58KHz handheld verifier and ensure it is calibrated to the specific ambient frequency of your store's EAS environment to avoid false positives from electronic noise.
- Position at the 1.5-Meter Threshold: Place the labeled model at the halfway point between standard exit pedestals. This is the 'weakest link' in the detection field where the magnetic flux is at its lowest.
- Execute the Multi-Axis Sweep: Rotate the model slowly through the X, Y, and Z axes while monitoring the signal indicator. This ensures the label responds even when carried at an awkward angle by a shoplifter.
- Verify Signal Clipping and Interference: Check for 'signal masking'—if the model contains metallic internal parts, the signal may be dampened. Ensure the meter shows a crisp resonance peak rather than a broad, weak wave.
Expert Insight: The 'Proximity Dampening' Effect. In my 20 years of retail security engineering, I have observed that high-pigment metallic paints on die-cast models can create a localized Faraday effect. If your field tester shows a signal drop of more than 30% after application, the label is too close to a conductive surface. Introduce a 1mm non-conductive buffer (like a double-sided foam spacer) between the model and the label to restore resonance and ensure the alarm triggers every time.
Why does the alarm trigger sometimes but not always?
This is usually due to orientation. If the label is perpendicular to the pedestal's magnetic field lines, it receives less energy. Re-testing with a field meter helps identify the 'sweet spot' for label placement.
Can the model's internal battery interfere with the label?
Yes. Active electronics or magnets (found in motorized models) can shift the frequency of the 58KHz label. Always test the label while the model's electronic components are in their 'off' state.
Is a handheld deactivator enough for testing?
No. Deactivators only check if a tag is 'alive.' To ensure detection at the door, you must use a signal strength meter that simulates the actual distance between gate pedestals.
Safe Removal Procedures: The Ultimate Test of Non-Marking Integrity
Safe removal is the definitive validation of a non-marking label's quality, requiring a controlled release of the adhesive bond that prioritizes the structural integrity of the underlying model over speed. By utilizing low-angle peeling techniques and localized thermal modulation, collectors and retailers can effectively eliminate the risk of delamination, paint lifting, or 'adhesive ghosting'—the faint oily shadow often left by inferior security tags on porous or high-gloss finishes.
- Thermal Pre-treatment: Apply gentle heat using a professional-grade heat gun or a standard hairdryer on the lowest setting for 10-15 seconds. This lowers the viscosity of the pressure-sensitive adhesive (PSA), allowing it to release from the model's microscopic surface topography without pulling on the paint layer.
- Edge Initiation: Use a non-marring plastic spudger or a fingernail to gently lift one corner of the label. Avoid metal blades or tweezers that can scratch the protective clear coat of the model.
- The 45-Degree Constant Peel: Pull the label back slowly at a 45-degree angle relative to the surface. Maintaining a slow, constant velocity is critical; 'snapping' the label off can cause 'interfacial failure,' where the adhesive separates from the label backing and stays on the model.
- Surface Verification: Once removed, inspect the area under a secondary light source. For high-end collectibles, a quick pass with a microfiber cloth and a drop of distilled water is sufficient to restore the original luster.
| Material Type | Risk Factor | Removal Strategy | Recommended Tool |
|---|---|---|---|
| Cold-Cast Resin | High (Brittle) | Slow 30-degree peel | Plastic Spudger |
| Die-Cast Metal | Low | Direct thermal lift | Microfiber Cloth |
| Injection Molded Plastic | Medium (Solvent Sensitive) | Dry peel only | Fingernail |
| Hand-Painted Finishes | Critical | Extended thermal softening | Low-Heat Gun |
Expert Tip: To verify if a label is truly 'non-marking' before a full-scale rollout, perform a 'Shear-Stress Test' on a hidden area of a prototype. If the label can be removed after 72 hours of dwell time without leaving a tactile or visual delta on the substrate, the adhesive chemistry is compatible with your material's surface energy.
What if there is a tiny bit of residue left?
If residue occurs, do not use alcohol or acetone, as these can melt model plastics. Use the 'tack-lift' method: take the removed label and lightly dab the sticky side against the residue until it lifts off.
Can I reuse a non-marking label after removal?
No. Non-marking labels are designed for single-use. The removal process stretches the internal 58KHz resonators, which shifts their frequency and renders them inactive for future security detection.
Does heat damage the model's internal components?
Only if applied excessively. Keep the heat source moving and maintain a distance of at least 6 inches. The goal is to reach a surface temperature of approximately 40°C (104°F), which is safe for most resins.
Maintenance and Storage of Soft Labels to Prevent Degradation
To prevent degradation of 58KHz non-marking soft labels, they must be stored in a climate-controlled environment with temperatures between 60°F and 75°F (15°C–24°C) and a relative humidity of 40-60%. Effective maintenance involves shielding the labels from direct UV exposure and maintaining a 'magnetic buffer zone' of at least three feet from electronic interference, which prevents premature deactivation or signal dampening before the labels are even applied to fragile models.
| Environmental Factor | Optimal Range | Risk of Non-Compliance |
|---|---|---|
| Temperature | 60°F - 75°F | Adhesive bleeding or loss of tackiness |
| Humidity | 40% - 60% RH | Liner curling and signal interference |
| UV Exposure | Zero (Dark Storage) | Polymer breakdown and yellowing |
| Proximity to Magnets | > 3 Feet | Partial deactivation or 'ghosting' effects |
- Implement FIFO Inventory Management: Always use a First-In, First-Out system. Even high-grade non-marking adhesives have a shelf life of approximately 12 to 18 months; using older stock first prevents the 'permanent set' adhesive bond that can damage fragile models upon removal.
- Original Packaging Retention: Keep labels in their original anti-static moisture-barrier bags until the moment of application. This protects the precision-tuned 58KHz resonators from dust and micro-particulates.
- Vertical Stacking Prevention: Store label sheets or rolls horizontally. Vertical stacking or placing heavy objects on top of label boxes can cause 'adhesive ooze,' where the glue migrates to the edges, potentially leaving marks on your models.
Expert Tip: Be aware of 'Magnetic Ghosting.' In many stockrooms, labels are inadvertently stored near large electric motors, HVAC units, or even high-end speakers. These devices emit low-level electromagnetic fields that can slightly shift the bias of the 58KHz AM resonators. This doesn't fully deactivate the label, but it reduces the detection range at the exit pedestal, creating a false sense of security while the labels are technically compromised.
Can I store labels in a cold warehouse?
Cold temperatures make the adhesive brittle. If labels are stored below 50°F, they must be 'acclimatized' to room temperature for 24 hours before application to ensure the non-marking bond forms correctly.
Do these labels expire?
While the 58KHz signal is stable for years, the specialized non-marking adhesive is the weak link. After two years, the chemical composition may change, increasing the risk of leaving residue on fragile surfaces.
How do I know if my labels have degraded?
Perform a 'snap test.' If the label feels stiff or the liner is difficult to peel, the adhesive is likely compromised. Use a field tester to verify the 58KHz frequency is still resonant at full strength.