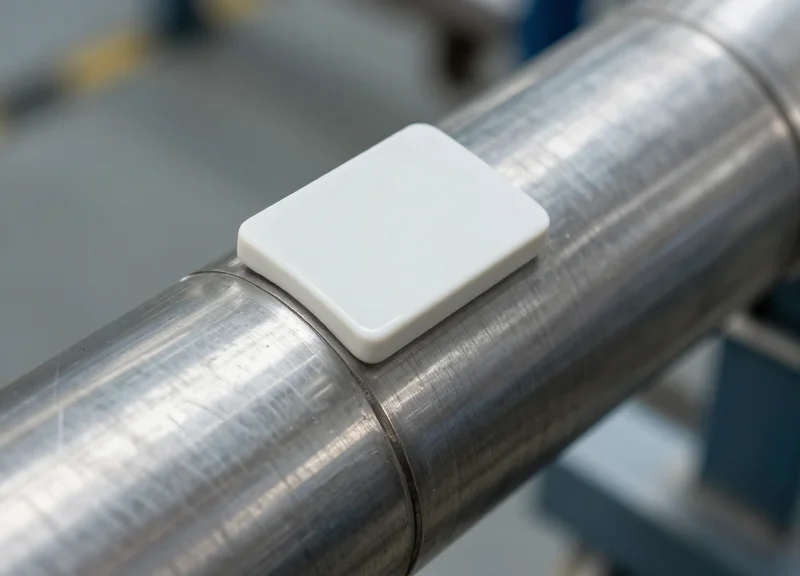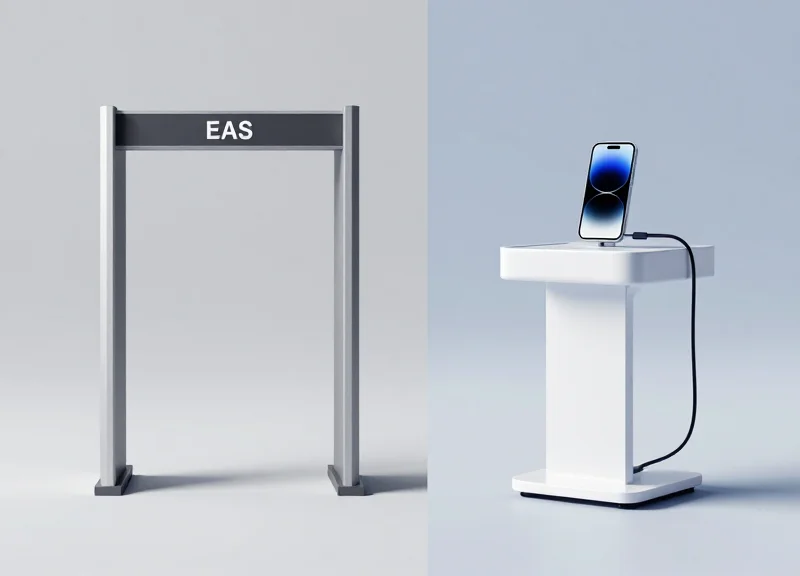

In the high-stakes world of retail and inventory management, precision is everything. When issuing RFID cards at a desktop station, the difference between a successful batch and a logistical nightmare often comes down to just a few millimeters. Standard antennas often suffer from overshoot, reading multiple tags simultaneously and causing data corruption. This guide dives into the technical nuances of 15mm precision tuning, providing a roadmap for configuring near-field antennas to ensure every single card is issued with 100% accuracy, every time.
The Physics of Near-Field vs. Far-Field Antennas

Near-field antennas utilize magnetic induction (inductive coupling) to transfer energy to a tag within a very short range, whereas far-field antennas utilize electromagnetic radiation (backscatter) to communicate over long distances. In desktop card issuing, the near-field approach is mandatory because it creates a controlled 'interrogation zone' that ignores any tags outside a specific 15mm-to-50mm radius, effectively eliminating the risk of 'phantom reads' from adjacent cards sitting on the technician's desk.
| Feature | Near-Field (Inductive) | Far-Field (Radiative) |
|---|---|---|
| Primary Mechanism | Magnetic Field / Coupling | Electromagnetic Wave / Backscatter |
| Power Decay Rate | 1/r^3 (Very Rapid) | 1/r^2 (Slower) |
| Optimal Range | 0mm to 100mm | 1m to 15m+ |
| Desktop Suitability | High (No Cross-Talk) | Low (High Interference) |
The '15mm precision' required for professional card issuing relies on a physical boundary called the Fraunhofer distance. While far-field waves travel outward like a flashlight beam, near-field energy behaves like a magnetic bubble. Because power in the near-field decays at the inverse cube of the distance (1/r^3), a card moved just a few centimeters away from the reader sees a massive drop in energy. This rapid attenuation is the 'secret sauce' that allows multiple desktop readers to operate side-by-side without interfering with one another.
- Why does far-field technology fail in desktop issuing?: Far-field antennas are designed to propagate energy; their signals reflect off metal desks and office furniture, causing 'stray reads' where a reader accidentally encodes a card inside a box five feet away.
- What is the 'Reactive Near-Field' boundary?: For UHF RFID (860-960MHz), the reactive near-field zone ends at approximately 50mm. Configuring your hardware for a 15mm sweet spot ensures you are operating in the most stable portion of the magnetic field.
- Expert Tip: The Transformer Perspective: In the Silicon Valley hardware labs, we view a 15mm near-field setup not as a radio, but as an air-core transformer. The antenna is the primary winding and the tag is the secondary. The 'precision' comes from managing the Q-factor of the loop to ensure the magnetic flux is concentrated strictly above the reader surface.
Why 15mm? The Gold Standard for Desktop Card Issuing

The 15mm read range represents the 'Golden Zone' for desktop card issuing because it provides the perfect equilibrium between electromagnetic coupling stability and localized security. By restricting the antenna's effective interrogation zone to exactly 15 millimeters, engineers create a physical gatekeeper that is wide enough to tolerate minor user placement errors while remaining narrow enough to prevent the 'Stray Read' phenomenon—where adjacent cards or tags in a worker's pocket or card stack are accidentally encoded.
In a high-throughput card issuing environment, the primary enemy is signal spillover. Standard far-field antennas can easily reach several meters, which is catastrophic for a desktop setting. Even poorly tuned near-field antennas often bleed out to 100mm or more. At 15mm, the energy density of the magnetic field (H-field) is concentrated strictly above the reader's surface, ensuring that the 'Target Card' is the only device receiving sufficient power to wake up its integrated circuit.
| Range Setting | Coupling Type | Stray Read Risk | Primary Application |
|---|---|---|---|
| 0-5mm | Direct Contact | Near Zero | Payment Terminals |
| 10-15mm | Precision Near-Field | Negligible | Desktop Card Issuing |
| 30-100mm | Loose Near-Field | High (Cross-talk) | Access Control Gates |
| 1m+ | Far-Field | Extremely High | Warehouse Logistics |
Expert Insight: The 'Card Stack Dilemma' and 15mm Clearance. A unique challenge in card issuing is that operators often have a stack of unencoded cards sitting just inches away from the reader. If your antenna is tuned to 50mm, the reader may unintentionally address the bottom card of the stack rather than the one placed on the pad. My '15mm Rule' accounts for the typical height of a card hopper or a stack of 20 ISO-standard cards, providing a physical buffer that software logic alone cannot replicate.
Why not just use a 0mm contact-only range?
A 0mm range requires the card to be perfectly flush, which increases mechanical wear on the reader and leads to 'bad reads' if the card is slightly warped or if there is any debris on the surface. 15mm allows for a 'hover' state that improves user ergonomics.
Does 15mm work for all card types?
While 15mm is the target for standard PVC cards, metallic or shielded cards may require slight attenuation adjustments. However, 15mm remains the best baseline for calibrating the RSSI (Received Signal Strength Indicator) thresholds.
How does 15mm affect encoding speed?
Because the signal is concentrated, the signal-to-noise ratio (SNR) is significantly higher at 15mm than at longer ranges, which reduces packet loss and leads to faster, more consistent data transmission during the encoding phase.
Common Challenges: Tackling the Cross-Read Dilemma
The cross-read dilemma occurs when an RFID/NFC reader captures data from unintended tags within its activation range, often caused by high-gain antennas or improper power settings that exceed the necessary 15mm read zone. In desktop card issuing, this phenomenon leads to 'ghost' reads where cards in a nearby stack, an operator’s pocket, or even a neighboring desk are processed instead of the target credential. This lack of spatial selectivity results in severe database integrity issues, duplicate records, and high failure rates during batch personalization.
Standard off-the-shelf readers are frequently designed for 'read range,' a metric that is the enemy of precision card issuing. In a professional workflow, cards are usually kept in high-density stacks. If your antenna's lobe is too broad, the electromagnetic field (H-field) induces enough current in the second or third card in the stack to wake up their integrated circuits. This creates a race condition where the reader may lock onto the wrong UID, leading to what we call 'Data Displacement Errors'—writing the metadata for User A onto the physical chip of User B.
| Scenario | Standard Reader Outcome | Precision 15mm Tuning Outcome |
|---|---|---|
| Stacked Cards (10+) | Collision; multiple tags detected. | Only the bottom-most card is read. |
| Operator Proximity | Reads wallet in pocket (False Positive). | Operator tags ignored completely. |
| Encoding Process | Risk of 'bricking' nearby tags. | Targeted write to the active field only. |
| Database Sync | High error rate/Manual cleanup. | Deterministic 1:1 data mapping. |
Expert Insight: The 'Phantom Write' Risk. One of the most dangerous aspects of the cross-read dilemma isn't the failure to read, but the accidental 'write' command. If a reader is configured with high output power to overcome poor antenna design, the command packet to write an encrypted sector may be received by two cards simultaneously. If one card is slightly out of range, it may receive a partial or corrupted packet, resulting in a 'bricked' or permanently locked chip. Precision 15mm tuning isn't just for efficiency; it is a critical safety mechanism for your hardware inventory.
Why doesn't simple metal shielding always solve the cross-read problem?
While metal reflects RF, it can create 'hot spots' through multipath interference. If the antenna is not impedance-matched for the desktop environment, adding metal shielding can shift the resonant frequency, actually decreasing the reliability of the intended read while failing to kill the side-lobes.
Can software logic (RSSI filtering) replace hardware tuning?
RSSI (Received Signal Strength Indicator) filtering is a helpful secondary defense, but it is not a silver bullet. Signal strength can fluctuate based on card orientation and chip sensitivity. The only foolproof method is a hardware-level 'Field Nulling' approach that physically limits the magnetic coupling to the 15mm threshold.
What is the primary cause of database corruption in desktop issuing?
The 'Hidden Node' problem: a secondary card is just far enough away to be read intermittently but not reliably. The reader starts a write sequence, the card loses power mid-cycle, and the database marks the card as 'Issued' while the physical chip remains blank or corrupted.
Hardware Selection: Choosing the Right Near-Field Antenna

To achieve a reliable 15mm read zone for desktop card issuing, hardware selection must pivot away from traditional high-sensitivity metrics toward 'negative gain' engineering. The ideal near-field antenna is not characterized by how far it can reach, but by how sharply its magnetic field dissipates beyond the target threshold. For professional card issuance, this means selecting antennas with a gain profile typically between -15 dBi and -30 dBi, ensuring that the 'bubble' of energy is physically incapable of exciting tags located even 5cm away.
| Feature | Near-Field (15mm Precision) | Standard RFID (Far-Field) |
|---|---|---|
| Antenna Gain | -15 to -30 dBi (Low/Negative) | 5 to 9 dBi (High) |
| Polarization | Circular (Orientation Independent) | Linear or Circular |
| Coupling Type | Magnetic/Inductive | Electric/Radiative |
| Optimal Range | 0 - 30 mm | 3 - 12 Meters |
The Expert Insight: The 'Negative Gain' Paradox. In the world of desktop issuing, a 'powerful' antenna is your worst enemy. Most engineers instinctively look for high-gain hardware, but for 15mm precision, you must seek antennas specifically designed with engineered losses. These antennas utilize a localized magnetic field (H-field) rather than an electric field (E-field). Because the H-field decays at a rate of 1/r³ (where r is distance) compared to the E-field's 1/r², you get a much sharper 'cliff' at the edge of your 15mm zone, virtually eliminating accidental reads of adjacent cards.
Why is Circular Polarization preferred over Linear for desktop readers?
Circular polarization allows the reader to catch the tag regardless of how the card is placed on the pad (horizontal, vertical, or skewed). Linear antennas require the tag and antenna to be perfectly aligned, which leads to high 'false failure' rates in rapid desktop issuing environments.
What role does the antenna's physical size play?
The 'Aperture' size should ideally match the size of the target tag. For a standard ID-1 card, an antenna with a footprint no larger than 50mm x 50mm helps concentrate the flux lines within the 15mm vertical space, preventing the field from 'bleeding' horizontally into stacks of waiting cards.
Should I use integrated or external antennas?
For 15mm precision, external antennas connected via high-quality shielded MMCX or SMA cables are superior. They allow you to mount the antenna directly under a non-metallic surface (like acrylic or glass), minimizing interference from the reader's own internal circuitry.
Finally, ensure the antenna housing is 'Near-Field Optimized.' High-end models often include integrated back-plane shielding (ferrite or metal plates) that prevents the signal from radiating downward into the desk or upward toward the user's monitor, further tightening the read-zone geometry.
Step-by-Step Guide to 15mm Precision Tuning

15mm precision tuning is the technical process of calibrating a near-field antenna's transmit power and physical mounting geometry to create a strictly defined read hemisphere. By balancing electromagnetic coupling strength against physical distance, technicians can ensure that the antenna only activates tags within a 15mm radius, effectively ignoring any stacked or adjacent cards. This calibration is essential for desktop environments where 'cross-talk' between multiple high-frequency (HF) or ultra-high frequency (UHF) tags can lead to database corruption and incorrect card encoding.
- Establish the Physical Baseline: Mount the antenna flush against the underside of the desktop or within its housing, ensuring there are no metallic obstructions between the antenna face and the card placement zone. Maintain a consistent distance to the top surface to define your Z-axis zero point.
- Calibrate Power Attenuation (TX Power): Begin with the reader's power settings at their lowest possible increment (e.g., 5dBm or 10mW). Gradually increase the power in 1dBm steps until the card is consistently read at exactly 15mm, then stop. Excess power is the primary cause of reading cards still in the tray.
- Apply Ferrite Shielding for Back-Lobe Suppression: (Expert Tip) Apply a thin layer of high-permeability ferrite material to the back and sides of the antenna. This focuses the magnetic flux upward and prevents the 'read bubble' from extending through the bottom of the desk, which often causes accidental reads of tags placed in drawers below the workspace.
- Optimize Polarization Alignment: Align the antenna's primary polarization axis with the expected orientation of the card’s internal inlay. For multi-orientation issuing, use a circularly polarized near-field antenna to ensure the 15mm threshold remains constant regardless of how the user places the card.
- Validate with the 'Dead Zone' Test: Place a 'sacrifice' card at 25mm and another at 15mm. The system should only recognize the 15mm card. If both are read, decrease power by 0.5dBm or add a thin dielectric spacer (like a plastic shim) to physically offset the antenna.
| Configuration Parameter | Optimal Setting for 15mm | Common Misconfiguration |
|---|---|---|
| Transmit Power (TX) | 5dBm - 12dBm (Adjustable) | Default Max Power (30dBm) |
| Mounting Depth | 2mm - 5mm below surface | Surface-flush (causes scraping) |
| Surface Material | Non-conductive (Plastic/Wood) | Metal or Carbon-Fiber desks |
| Antenna Orientation | 0-degree parallel to card | Vertical or angled placement |
How do environmental factors affect the 15mm zone?
Ambient temperature has negligible effects, but nearby metal objects or large monitors can warp the magnetic field. Always calibrate in the final deployment location.
Can I achieve 15mm precision with a standard far-field antenna?
No. Far-Field antennas are designed for gain and distance; even at low power, their radiation pattern is too unpredictable for 15mm precision. Only Near-Field (inductive) antennas should be used.
What is the 'Reflection Error' in desktop tuning?
Reflection occurs when the signal bounces off metal desk frames, creating ghost read zones. Ferrite backing is the industry-standard solution to mitigate this.
Software Configuration and Power Level Calibration

Software configuration and power level calibration represent the final 'digital' layer of precision tuning, where raw hardware capabilities are refined to achieve a surgical 15mm read zone. This process involves modulating the RF output power (measured in dBm) to control the size of the electromagnetic field and setting Receive Signal Strength Indicator (RSSI) thresholds to filter out any unintended tag responses that bleed beyond the targeted hemisphere. In desktop card issuing, software-level control is the primary defense against 'cross-reads' from adjacent cards or environmental noise.
- Initialize with Minimum Power: Begin by setting your reader's RF output power to its lowest possible setting (typically 5 dBm to 10 dBm). Gradually increase the power in 1 dBm increments while placing a card exactly 15mm from the antenna surface until a consistent read is achieved.
- Establish the RSSI Floor: Analyze the RSSI values of the successful reads at 15mm. If the reader returns a signal strength of -60 dBm at this distance, set your software filter to discard any tags reporting -65 dBm or weaker.
- Configure Read Cycles and Durations: Set the inventory search mode to 'Single Target' and reduce the session dwell time. Shorter bursts of RF energy prevent the field from building up enough energy to accidentally wake up high-sensitivity tags in the periphery.
- Implement the 'First Seen' Logic: In the middleware, prioritize the tag with the highest RSSI value and the fastest timestamp. In a near-field environment, the card intended for processing will almost always provide the strongest signal peak.
| Power Setting (dBm) | Approximate Read Depth | Recommended Use Case |
|---|---|---|
| 5 - 10 dBm | 5mm - 15mm | Ultra-high precision card issuing |
| 11 - 18 dBm | 15mm - 50mm | Document tracking / POS stations |
| 19 - 30 dBm | 0.5m - 3.0m | Standard long-range inventory (Avoid for Desktop) |
Expert Insight: The 'Sensitivity Gap' Strategy. Most engineers focus only on lowering the reader's output power. However, a more robust method is to keep power slightly higher (e.g., 12 dBm) but artificially inflate the reader's sensitivity threshold via software. This creates a high-contrast 'signal cliff' at the 15mm mark. By doing this, you ensure that the intended card receives plenty of energy for a fast chip response, while the software ruthlessly ignores the weaker reflections from cards just a few millimeters further away.
reader.setAntennaPortPower(1, 10); // Set Power to 10dBm
reader.setReaderSensitivity(-60); // Drop tags weaker than -60dBm
reader.setInventorySession(1); // Use Session 1 for rapid re-reads
Why is my reader still picking up cards 30cm away at low power?
This is often due to 'backscatter gain' or constructive interference. Ensure you are using a true Near-Field (NF) antenna and check if the 'Search Mode' is set to Dual Target; switch it to Single Target to minimize stray reads.
Should I adjust the 'Reader Sensitivity' or the 'Antenna Power' first?
Always adjust Antenna Power first to physically limit the field. Use Reader Sensitivity (RSSI filtering) as the fine-tuner to clean up the edges of that field.
Environmental Factors: Managing Metallic Interference

Managing metallic interference in 15mm precision tuning involves neutralizing the 'eddy current effect,' a phenomenon where conductive surfaces reflect or absorb RF energy, shifting the antenna's resonant frequency and distorting the read zone. For desktop card issuing, proximity to steel-reinforced desks, metal enclosures, or internal electronic components can cause a 'detuning' of the antenna, resulting in missed reads or unintentional range extensions. Success requires maintaining a dielectric gap—typically using non-conductive spacers—or employing high-permeability ferrite shielding to decouple the antenna from the surrounding metallic environment.
| Environmental Factor | Interference Level | Min. Recommended Gap | Mitigation Strategy |
|---|---|---|---|
| Steel/Metal Desks | Critical (Detuning) | 20mm | Acrylic or Wood Spacers |
| Aluminum Chassis | High (Eddy Currents) | 15mm | Ferrite Backing Sheets |
| Electronic Noise (LCDs) | Moderate (EMI) | 300mm | Shielded USB/Serial Cables |
| Adjacent Readers | High (Crosstalk) | 500mm | Frequency Hopping/TDM |
- Identify the 'Metallic Footprint': Use a handheld field analyzer or RSSI monitoring tool to map the signal strength around the desk. If the RSSI fluctuates wildly when the reader is moved closer to the desk surface, you have a metallic interference issue.
- Implement Physical Decoupling: Never mount a near-field antenna directly onto a metal surface. Use a dielectric spacer (plastic, glass, or dry wood) of at least 15mm to create an air gap that allows the magnetic field to form without being dampened by the metal.
- Apply Ferrite Shielding: If space is limited, apply a thin layer of flexible ferrite material between the antenna and the metal surface. This redirects the flux lines and prevents the formation of counter-active eddy currents.
Expert Insight: The 'Reflector Plane' Advantage. While most engineers see metal as a purely negative factor, veteran integrators can use a fixed metal base as a controlled reflector. By placing a specific 12mm dielectric spacer over a metal plate, you can actually compress the RF field into a more stable, flatter 'pancake' shape. This 'Virtual Ground' technique prevents the signal from reaching beneath the desk, effectively eliminating 'ghost reads' from cards stored in desk drawers while sharpening the 15mm boundary above the reader.
Does metallic flake paint on a desk affect the read range?
Yes. Even micro-conductive particles in automotive-grade or metallic-effect furniture finishes can cause minor detuning. Use a non-metallic mat under the reader if performance is inconsistent.
Why does my reader work fine until I plug in my monitor?
This is likely EMI (Electromagnetic Interference) rather than metallic detuning. Ensure your RFID reader uses a shielded USB cable with a ferrite bead to prevent the monitor's power supply noise from 'bleeding' into the antenna circuit.
Can I use carbon fiber as a spacer?
No. Carbon fiber is conductive and will behave similarly to metal, causing eddy currents. Stick to polymers like Delrin, ABS, or Acrylic for the best dielectric properties.
Testing Protocols for Error-Free Card Issuance
Testing protocols for error-free card issuance are systematic validation procedures designed to verify that an RFID antenna reads only the target card within the 15mm 'sweet spot' while ignoring all surrounding tags. This involves a combination of 'Zero-Neighbor' read tests, RSSI boundary mapping, and thermal stability checks to ensure the near-field configuration survives the rigors of a high-duty-cycle production environment.
- The Boundary Map Test: Place a test card at the center of the antenna and gradually move it outward in 2mm increments. Mark the exact point where the signal drops. Repeat this on all four axes to visualize your 15mm hemisphere.
- The 'Ghost' Stress Test: Place three cards 20mm away from the antenna in various positions while a single card is placed in the active 15mm zone. Run 100 read cycles; any detection of the 'ghost' cards indicates the power levels are too high.
- Duty Cycle Endurance Run: Execute a continuous read/write operation for 30 minutes. Some antennas experience 'thermal drift' where internal heat shifts the RF frequency slightly, potentially shrinking or expanding the read zone.
- Orientation Variance Check: Rotate the card 45 and 90 degrees within the 15mm zone. Near-field antennas can be sensitive to tag orientation; ensure the read remains successful regardless of how the card is placed.
| Test Metric | Target Performance | Failure Condition |
|---|---|---|
| Read Success Rate | 99.99% (10,000/10,000) | Any failed read within 15mm |
| Cross-Read Rate | 0% at >20mm | Single detection of adjacent card |
| RSSI Consistency | +/- 3 dBm variance | Spikes exceeding 6 dBm |
| Command Latency | < 50ms per encode | Timeouts or retries required |
Expert Tip: Perform the 'Empty Hopper' Reflection Test. In desktop issuance, the metal components of a card dispenser or hopper can act as parasitic resonators when the card stack gets low. Test your 15mm tuning when the hopper is full AND when it is nearly empty. If the read zone expands when the stack is low, you may need to apply a small piece of RF-absorbing ferrite material to the back of the hopper to stabilize the field.
Why does my antenna read a card 50mm away during testing?
This is likely 'Backscatter leakage.' Your antenna power (dBm) is too high for a near-field application. Lower the power in 1dBm increments until the read range stays within 18-20mm maximum.
How often should I re-test the desktop station?
Re-validation should occur every time the desktop layout changes, such as moving the reader closer to a computer monitor or metallic office equipment, which can distort the RF field.
Should I test with different card types?
Absolutely. Different chipsets (e.g., NTAG vs. MIFARE) and varying inlay sizes change the resonance. Always tune and test using the specific card stock intended for production.
Advanced Maintenance: Keeping Your Station Calibrated
To maintain a consistent 15mm read zone over time, advanced maintenance must evolve from reactive troubleshooting to proactive 'Drift Management.' RF components, including near-field antennas and coaxial connectors, are subject to thermal expansion and electrical fatigue that can shift your RSSI (Received Signal Strength Indicator) thresholds by as much as 3-5 dBm over a six-month period. Systematic calibration ensures that your 'sweet spot' remains centered, preventing the desktop station from either failing to read valid cards or accidentally picking up cards in the queue.
| Maintenance Level | Frequency | Primary Objective |
|---|---|---|
| Physical Inspection | Weekly | Ensure connector tightness and remove metallic debris from the antenna surface. |
| Signal Baseline Test | Monthly | Verify that a standard test card triggers at exactly 15mm within a +/- 2mm margin. |
| RF Environment Audit | Quarterly | Check for new localized interference sources (e.g., new monitors or wireless chargers). |
| Firmware/Middleware Sync | Bi-Annually | Update reader firmware to optimize power consumption and signal processing algorithms. |
The Pro-Tip: The 'Thermal Offset' Factor. Many engineers overlook the fact that as a desktop reader operates throughout an eight-hour shift, internal heat can slightly alter the impedance of the antenna circuit. For high-volume card issuing environments, I recommend performing your precision tuning only after the reader has reached a steady-state operating temperature (typically 15-20 minutes of power-on time). Calibrating a 'cold' reader often leads to a slight loss of sensitivity once the unit warms up, potentially shrinking your 15mm zone to 10mm.
- Clean the Antenna Radome: Use non-static, isopropyl alcohol-free wipes to remove dust and oils. Surface contaminants can create a dielectric layer that subtly affects near-field coupling.
- Recalibrate Power Levels: Run a sensitivity sweep using your middleware. If the card is detected at 20mm, reduce the RF output power in 0.5 dBm increments until the 15mm threshold is restored.
- Inspect Coaxial Integrity: Check the SMA or MMCX connectors for any 'wiggle.' A loose connection introduces signal reflection (VSWR), which is the leading cause of intermittent read failures in precision setups.
- Verify 'Dead Zone' Logic: Place a card 50mm away and ensure it is NOT read. Maintenance isn't just about reading the card; it's about ensuring the exclusion zone remains silent.
How often should I update the reader firmware?
Only update firmware when the manufacturer releases a patch specifically addressing signal stability or RSSI reporting. For precision 15mm setups, if the system is stable, 'don't fix what isn't broken' is often the best policy.
Can moving the reader to a different desk affect calibration?
Absolutely. Even moving the antenna 10cm on a metal-reinforced desk can alter the electromagnetic field shape. Always perform a 'spot check' calibration after any physical relocation of the hardware.
What is the most common cause of 'calibration drift'?
The most common culprit is cable strain. Over time, the internal shielding of the RF cable can degrade if it is bent sharply or moved frequently, changing the attenuation characteristics of the signal path.