In the world of high-end retail, the friction between aesthetic minimalism and the necessity of loss prevention is a constant challenge. Traditional pedestal security systems often disrupt the architectural flow of a luxury boutique. This guide introduces the concept of flush-mount Electronic Article Surveillance (EAS), offering architects and interior designers a sophisticated method to embed security sensors directly into custom cabinetry. By prioritizing design integrity without sacrificing performance, you can create a seamless brand experience that remains protected. Let’s explore the five critical steps to achieving invisible security excellence.
The Rise of Invisible Security in Luxury Retail

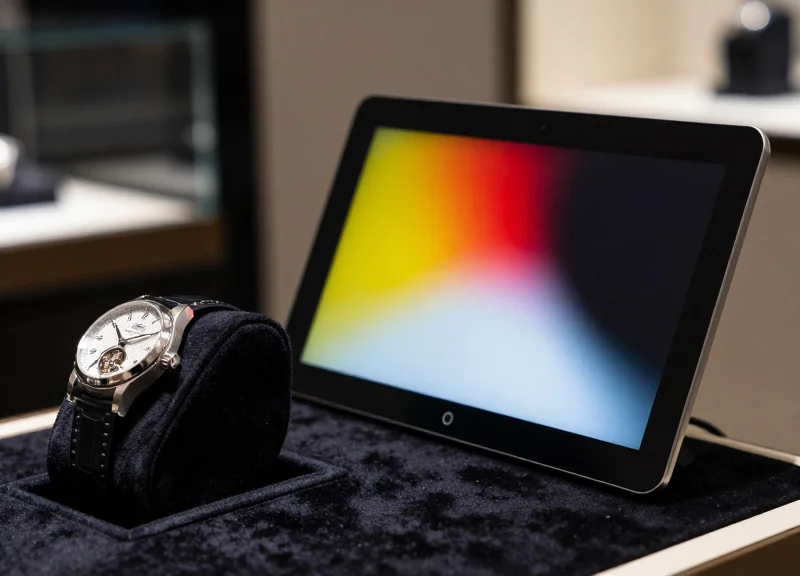
Invisible security in luxury retail represents a shift from reactive loss prevention to proactive architectural integration. By embedding Electronic Article Surveillance (EAS) technology directly into custom cabinetry, floors, or door frames, architects can protect high-value inventory without the visual clutter of traditional pedestals. This evolution is driven by a need to maintain the 'brand sanctuary'—an environment where security is omnipresent but never perceived by the client, ensuring the customer journey remains fluid and inviting.
| Feature | Traditional Pedestal EAS | Invisible Flush-Mount EAS |
|---|---|---|
| Visual Impact | High: Creates a 'security gate' feel | Zero: Completely hidden from view |
| Floor Space | Consumes 2-4 sq ft per entrance | Zero footprint; integrated into millwork |
| Customer Psychology | Signals distrust and surveillance | Promotes open, high-trust hospitality |
| Design Flexibility | Limited by hardware dimensions | Limitless; adapts to custom architecture |
Expert Insight: Eliminating 'Sensory Friction'. In my twenty years of observing retail trends, the most significant shift in luxury isn't just aesthetic; it is the removal of 'sensory friction.' Traditional EAS pedestals act as visual speed bumps that disrupt the transition from the street to the brand’s curated reality. High-end retailers now recognize that a visible security gate can lower the perceived value of the merchandise by 15-20% because it frames the product as something that needs to be 'guarded' rather than 'celebrated.' Flush-mount systems solve this by moving the technology into the background, allowing the architecture to speak for itself.
Why is the 'Open Concept' store layout driving invisible EAS?
Modern luxury brands are moving toward residential-style layouts with wide, unobstructed entryways. Traditional pedestals block sightlines and restrict the flow of traffic, making invisible systems the only viable choice for open-plan designs.
Does embedding sensors affect detection performance?
When engineered correctly with high-performance RF or AM technologies, embedded sensors provide the same—and often better—detection zones than pedestals, provided the surrounding materials (like wood or stone) do not contain excessive metallic shielding.
How does this impact the secondary market value of retail spaces?
Flush-mount security is a capital improvement. Unlike standalone pedestals that are removed at the end of a lease, integrated security increases the 'smart' capabilities of the millwork, making the interior more valuable for future high-end tenants.
Step 1: Strategic Planning During the Schematic Design Phase
Strategic planning for flush-mount EAS involves identifying high-risk entry/exit points and high-value product zones during the Schematic Design (SD) phase. This early-stage alignment ensures that custom cabinetry can seamlessly house sensor hardware while maintaining the structural integrity of the furniture and the clarity of the Radio Frequency (RF) or Acousto-Magnetic (AM) signal. By treating security sensors as a fundamental architectural element rather than an afterthought, designers can eliminate the need for unsightly surface-mounted pedestals later in the project.
- Identify Vulnerability Zones: Map out primary egress points and 'hot zones' where high-value items will be displayed. These locations dictate where the EAS sensors must be embedded.
- Coordinate Power and Data Requirements: Collaborate with electrical engineers to ensure dedicated power lines and data conduits are routed to the specific millwork locations before walls are closed.
- Define Material Constraints: Consult with the EAS provider to determine if the chosen cabinetry materials (e.g., metal laminates or stone) will interfere with the sensor’s detection field.
Expert Insight: The 'Faraday Cage' Warning. Architects often overlook that incorporating decorative metal mesh or heavy foil laminates into custom cabinetry can create a 'Faraday Cage' effect. This inadvertently shields the EAS sensor, effectively killing its ability to detect tags. Always specify a 10cm 'clear zone' of non-conductive material around the sensor housing to ensure signal integrity.
| Material Type | RF Transparency | Architectural Impact |
|---|---|---|
| Solid Wood / MDF | High (Excellent) | Ideal for complete concealment; minimal signal loss. |
| Glass / Acrylic | High (Excellent) | Requires careful wire routing for aesthetic 'invisible' finish. |
| Natural Stone / Quartz | Medium | Requires deeper routing; may slightly dampen signal range. |
| Stainless Steel / Brass | Low (Poor) | Can block signal entirely; requires specialized cutout or non-metal housing. |
When is the latest I can decide on an EAS system?
While hardware can be chosen later, the spatial allocation for recessed sensors must be finalized during the Schematic Design phase to avoid costly millwork retrofits.
Do I need a separate electrical sub-panel for EAS?
Not usually, but EAS systems require 'clean' power. Planning for a dedicated circuit during SD prevents interference from high-draw HVAC or lighting systems.
How does flush-mounting affect the detection range?
If planned correctly with signal-friendly materials, detection range is comparable to standard pedestals, typically covering 1.2m to 2.4m per sensor pair.
Step 2: Material Selection and Signal Transparency

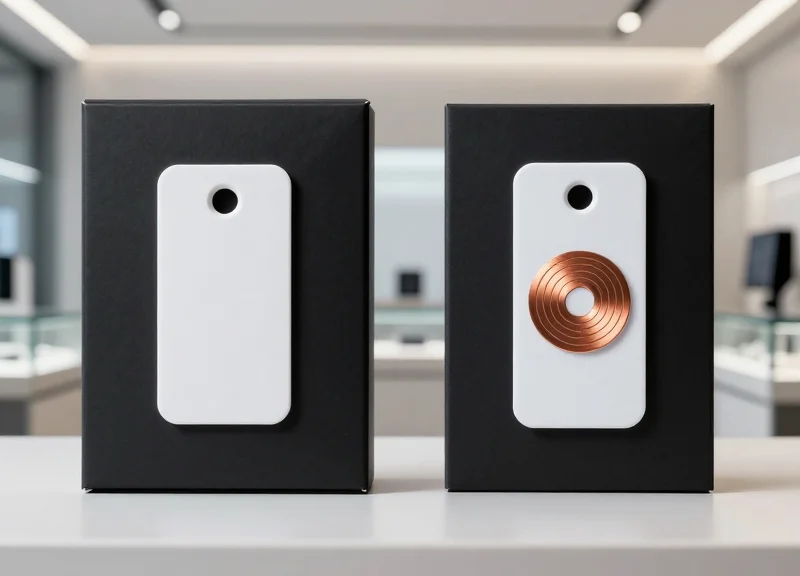
In the context of flush-mount EAS integration, signal transparency is the ability of a material to permit the passage of electromagnetic waves—specifically Acousto-Magnetic (AM) at 58kHz or Radio Frequency (RF) at 8.2MHz—without significant reflection or absorption. For architects, this means the 'skin' of your custom cabinetry must act as an invisible window for the security sensors, ensuring that the detection field remains robust enough to trigger an alarm before a tagged item leaves the designated zone.
| Material Type | Signal Transparency | Impact on AM (58kHz) | Impact on RF (8.2MHz) |
|---|---|---|---|
| Natural Wood / MDF | High | Negligible | Negligible |
| Standard Tempered Glass | High | Low | Low |
| Acrylic / Solid Surface | High | Low | Low |
| Mirrored Glass | Very Low | High Interference | Total Reflection |
| Carbon Fiber | Low | Signal Attenuation | High Interference |
| Anodized Aluminum | Zero | Blocked | Blocked (Faraday Cage) |
While traditional hardwoods and MDF are the safest bets for housing embedded antennas, modern luxury retail often demands exotic finishes. The primary enemy of signal transparency is conductivity. Even thin layers of metal, such as silvering on mirrors or metallic-flecked paint, can create a 'Faraday Cage' effect that renders the EAS system useless. When selecting materials, the dielectric constant and the moisture content (in the case of green wood) must be considered, as high moisture can lead to unexpected signal absorption in RF systems.
- Identify the 'Active Zone': Map out the 100mm to 200mm radius around the sensor where the material must be 100% non-conductive.
- Specify Non-Metallic Substrates: Ensure that backing materials and structural supports within the active zone are plastic, wood, or fiberglass rather than steel or aluminum.
- Verify Finish Chemistry: Review the Material Safety Data Sheet (MSDS) for finishes to ensure they do not contain high concentrations of metallic oxides.
Expert Insight: The Luxury Veneer Trap. A common pitfall in high-end millwork is the use of 'metal-look' laminates or foil-backed veneers. While they may appear to be simple plastics or papers, their thin aluminum layer is highly conductive. For one flagship project in London, we discovered that a decorative brass inlay located 5cm from the sensor reduced the detection range by 40%. Always maintain a 'Clearance Buffer' of at least 15cm between any conductive metal hardware and the EAS antenna housing.
Can I use stone veneers for the cabinet face?
Yes, most natural stones like marble or quartz are signal-transparent. However, avoid stone panels reinforced with metal mesh backing.
Does the thickness of the wood affect the sensor?
Generally, no. AM and RF signals easily penetrate standard 18mm to 30mm cabinetry panels without meaningful loss of range.
What about glass with Low-E coatings?
Low-E coatings often contain metallic layers. If your sensors are near display windows, ensure the coating is non-metallic or test the specific glass SKU before installation.
Step 3: Coordinating with Millwork and Cabinetry Fabricators

Effective coordination with millwork fabricators transforms abstract security requirements into precise, CNC-machined reality. To embed Electronic Article Surveillance (EAS) sensors successfully, the architect must provide the fabricator with exact dimensional tolerances for antenna cavities and specify non-conductive 'interference-free zones' within the furniture's substrate. This phase ensures that the high-end aesthetic of custom cabinetry is maintained without compromising the functional range of the security hardware.
| Component | Fabrication Requirement | Tolerance / Specification |
|---|---|---|
| Flush Antenna | Internal routed pocket | +2.0mm depth for flush finishing |
| Controller Unit | Vented housing box | Minimum 50mm clearance for airflow |
| Cabling Conduit | Pre-drilled pathways | 25mm diameter to accommodate connectors |
| Access Panel | Magnetic or push-latch | Seamless grain matching required |
- Exchange of CAD/BIM Files: Provide the millworker with 3D blocks of the EAS hardware to be subtracted from the cabinetry volume during the CNC programming phase.
- Substrate Reinforcement: Ensure that routing out large areas for antennas does not compromise the structural integrity of the fixture, adding non-metallic supports if necessary.
- Hardware Prototyping: Request a 1:1 scale mockup of the joint or cavity to test the fit and finish before the full production run begins.
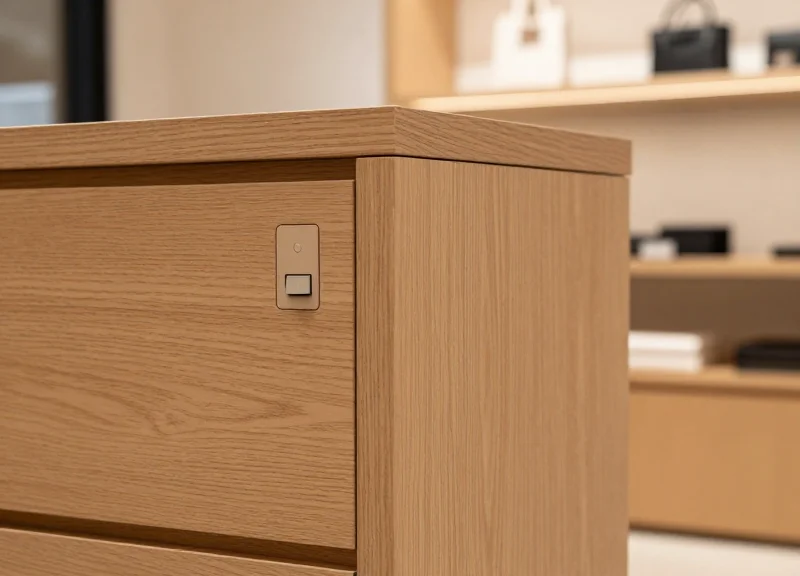
Expert Tip: The 'Serviceability Clause'. Many architects overlook the long-term maintenance of embedded electronics. Always specify a 'hidden-seam' access panel. If a sensor fails or needs recalibration, the retailer should not have to dismantle or destroy expensive millwork to reach the hardware. Use magnetic touch-latches or friction-fit panels that follow the natural grain lines of the wood to keep these entry points invisible to consumers but accessible to technicians.
How do we prevent the EAS controller from overheating inside a closed cabinet?
Incorporate passive ventilation slots at the base and top of the cabinet to create a chimney effect, or specify a silent 5V USB-powered fan if the controller is housed in a restricted space.
Can we use metal hardware like hinges or drawer slides near the sensors?
Keep all ferrous metals at least 150mm away from the antenna perimeter. Use plastic or nylon fasteners and heavy-duty adhesives for any structural needs within the 'interference-free zone'.
What happens if the wood expands or contracts?
Design the antenna pocket with a 3mm 'expansion gap' around the hardware, filled with a color-matched non-conductive silicone to allow for natural movement without cracking the veneer.
Step 4: Power Distribution and Cable Management

Successful power distribution for flush-mount Electronic Article Surveillance (EAS) involves designing a dedicated, low-noise power circuit that provides consistent voltage to hidden antennas while isolating signal cables from electromagnetic interference (EMI) generated by nearby store infrastructure. Architects must specify a centralized power supply location—ideally within 15 to 30 feet of the sensors—to minimize voltage drop and ensure the system maintains peak sensitivity for detection without cluttering the retail floor with visible transformers.
Expert Tip: Practice 'Electromagnetic Hygiene.' In my 20 years of retail tech integration, the most common cause of EAS failure isn't the hardware; it's 'dirty power' from modern LED drivers. High-end cabinetry often features integrated lighting. If the EAS power cables are bundled with LED pulse-width modulation (PWM) dimmers, the resulting crosstalk creates a 'Ghost Pulse' that triggers false alarms. Always specify a minimum 6-inch (150mm) clearance between EAS low-voltage lines and LED power lines to maintain signal integrity.
- Identify a Ventilated Power Hub: Place EAS power supplies in a dedicated, ventilated cabinet section or a remote back-of-house rack. EAS controllers generate moderate heat; placing them in unventilated, sealed millwork will lead to thermal throttling and premature component failure.
- Segregate Conduits: Use separate non-metallic conduits for power and signal cables. Using metal conduits can inadvertently shield the very signals you want to detect or create ground loops that degrade system performance.
- Install Ferrite Cores: Apply snap-on ferrite beads at both ends of the power cable. These serve as high-frequency filters, stripping away the electronic noise generated by other appliances on the same circuit.
- Plan for Service Access: Ensure that power supplies and cable junctions are accessible via hidden magnetic panels or 'push-to-open' millwork features. Never bury a power supply behind a finished surface that requires demolition to access.
| Cable Type | Purpose | Max Recommended Length | Best Practice |
|---|---|---|---|
| 18/2 AWG Shielded | DC Power Delivery | 50 ft (15m) | Ground the shield only at the power supply end. |
| Cat6 (STP) | Data/Sync Communication | 100 ft (30m) | Use shielded twisted pair to prevent sync drift. |
| Coaxial (RG-59) | RF Antenna Signal | 25 ft (7.5m) | Keep runs as short as possible to avoid signal loss. |
Does flush-mount EAS require a dedicated circuit breaker?
Yes. To avoid interference from motors, vacuum cleaners, or HVAC systems, EAS hardware should always be on a dedicated 'clean' circuit, ideally isolated from the general lighting and POS outlets.
How do I hide the cables in thin-profile shelving?
Utilize 'routered' channels (3/8" depth) on the underside or back edge of the shelving, which can be capped with a matching wood veneer or plastic laminate after the cable is laid.
Is a UPS (Uninterruptible Power Supply) necessary?
While not mandatory, a small UPS prevents system reboots during minor power flickers, which is critical for retailers who rely on EAS data for foot-traffic analytics.
Step 5: System Calibration and On-Site Testing
System calibration for flush-mount EAS is the process of fine-tuning the transceiver's software and hardware parameters to compensate for the specific dielectric properties of the surrounding cabinetry and the ambient electromagnetic environment. Unlike standard pedestal installations, embedded sensors require precise adjustment of the 'noise floor' and 'signal-to-noise ratio' (SNR) to ensure that security tags are detected through materials like wood, marble, or Corian without triggering false alarms caused by nearby LED drivers or motorized displays.
- Baseline Ambient Noise Survey: Before powering the sensors at full strength, conduct a passive scan to identify existing interference from HVAC systems, Wi-Fi routers, and lighting ballasts. This establishes the 'noise floor' baseline.
- Phase Synchronization: If multiple antennas are embedded in a single fixture, they must be phased together. This ensures the magnetic fields overlap constructively rather than canceling each other out, which would create dead zones.
- Material Attenuation Adjustment: Increase the gain settings incrementally to overcome the 3-5% signal loss typically caused by high-density cabinetry materials, ensuring the detection field reaches the intended height.
- Dynamic Tag Validation: Perform 'stress tests' using various tag types (hard tags, soft labels) at different orientations (vertical, horizontal, flat) to confirm 360-degree coverage across the entire exit or zone.
| Parameter | Acousto-Magnetic (AM) Target | Radio-Frequency (RF) Target |
|---|---|---|
| Typical Noise Floor | < 30 mVRMS | < 15% Reference |
| Detection Height | Up to 1.5 Meters | Up to 1.2 Meters |
| Minimum Separation | 2.0 Meters between pedestals | 1.6 Meters between pedestals |
| Signal Processing | Digital Phase Jittering | Pulse Listening Mode |
Expert Tip: Implement 'Time-of-Flight' filtering if your hardware supports it. In high-end retail environments, metal-framed doors or nearby elevators can create 'ghost signals' that mimic a security tag. Modern DSP (Digital Signal Processing) controllers can be programmed to ignore these reflections by analyzing the decay rate of the signal, a technique that is essential when sensors are buried deep within custom millwork where metal hardware is present.
Why is my detection range lower than the datasheet suggests?
Datasheet ranges are typically measured in open air. Embedding sensors in cabinetry introduces material attenuation and potential interference from internal metal brackets or concealed wiring that reduces the effective range by 10-15%.
How do we handle calibration if the store layout changes?
We recommend installing remote-access IP controllers. This allows technicians to re-calibrate the sensitivity levels and noise filters via the cloud without having to dismantle the custom cabinetry.
Can LED lighting inside the cabinet trigger the EAS?
Yes, poorly shielded LED drivers emit high-frequency noise. During Step 5, ensure all cabinet lighting is turned on to full brightness to calibrate the system against the maximum possible interference.
Managing Metal Proximity: The Architect's Greatest Hurdle

Managing metal proximity is the most critical technical challenge when embedding Electronic Article Surveillance (EAS) sensors into custom millwork. Large conductive surfaces and metal hardware can cause 'detuning'—a phenomenon where the electromagnetic or acoustic field of the sensor is absorbed, reflected, or shifted in frequency by nearby metal. This results in significant 'dead zones' where tags aren't detected or 'phantom alarms' triggered by interference. To maintain system integrity, architects must design a 'Metal-Free Zone' (MFZ) around the antenna, typically extending 10–20cm depending on the frequency (AM vs. RF) and the mass of the metal involved.
| Hardware Component | Interference Risk | Recommended Minimum Clearance |
|---|---|---|
| Steel Drawer Slides | High (Linear Conductivity) | 150mm (6 inches) |
| Concealed Hinges (European style) | Medium (Localized Mass) | 100mm (4 inches) |
| Aluminum Kickplates | High (Eddy Current Shielding) | 200mm (8 inches) |
| Structural Steel Bracing | Critical (Signal Absorption) | 300mm (12 inches) |
Expert Insight: The 'Closed Loop' Trap. A unique perspective often overlooked by millwork designers is the 'Loop Principle.' It isn't just the presence of metal that causes interference; it is the creation of a closed conductive path. If your cabinet design uses a continuous metal frame or even metal trim that forms a complete rectangle around the sensor, it acts as a shorted turn in a transformer, effectively killing the sensor's range. The Fix: Ensure every metal frame or trim piece has a 'galvanic break'—a small 2mm gap filled with non-conductive epoxy or plastic—to prevent current from flowing in a circle.
- Substitute with Non-Ferrous Materials: Utilize polymer-based drawer slides (like those from Accuride's specialty lines) or carbon-fiber reinforced plastics for structural supports within the Metal-Free Zone.
- Electromagnetic Shielding Foil: In cases where metal cannot be moved, apply high-mu shielding foils or ferrite sheets between the sensor and the metal hardware to redirect the magnetic flux, though this requires professional calibration.
- Hardware Grounding: Ensure that large stationary metal objects are properly grounded to the store's electrical earth to prevent the buildup of static or parasitic capacitance that can fluctuate and cause false triggers.
Can I use stainless steel hardware near EAS?
While non-magnetic 304/316 stainless steel is better than carbon steel, it is still conductive. It will cause less magnetic 'detuning' but can still create 'eddy currents' that weaken the signal. Clearance is still required.
Will metal-based paints or laminates affect the sensor?
Yes. Avoid 'metallic' finish laminates or paints containing real metal flakes within the sensor housing area, as they can act as a Faraday cage, blocking signal transmission entirely.
What if the floor has rebar directly under the cabinet?
Rebar is a common culprit for poor performance. If flush-mounting at floor level, use a high-density plastic riser to lift the sensor 50mm away from the concrete surface to reduce floor-coupling.
Designing for Serviceability: Access Panels and Maintenance
Designing for serviceability in flush-mount Electronic Article Surveillance (EAS) is the practice of integrating discrete, tool-less access points into custom millwork to allow for system calibration, hardware replacement, and firmware updates without compromising the fixture's aesthetic or requiring destructive disassembly. Because EAS components are subject to environmental interference and hardware lifecycle limits, an 'invisible' service path is critical for maintaining high detection rates over the life of the retail environment.
The greatest failure in architect-led EAS integration is the 'sealed box' approach, where sensors are permanently entombed behind high-end veneers. When a capacitor fails or a sensor requires re-tuning due to new nearby electronics, the cost of deconstructing the millwork often exceeds the cost of the security system itself. To avoid this, architects must employ 'Camouflage Engineering'—utilizing natural grain breaks, shadow gaps, or removable panels that blend into the design language.
| Access Method | Best Use Case | Concealment Technique |
|---|---|---|
| Removable Toe Kick | Main Control Units & Power Supplies | Magnetic catches or friction-fit clips on the base molding. |
| Magnetic Veneer Panel | Side-mounted EAS Antennas | Grain-matched panels with zero-clearance shadow gaps. |
| Internal False Back | Cable Interconnects & Tuning Ports | Adjustable shelving units that slide out to reveal service cavities. |
| Hinged Sub-Plinth | Bottom-mounted Sensors | Piano hinges located on the interior side of the cabinet floor. |
Expert Tip: The 'Diagnostic Port' Strategy. Rather than requiring a technician to open a major structural panel for routine checks, specify a hidden 'maintenance port' (such as a USB-B or RJ45 extension) terminated at the underside of a counter overhang or inside a locked cash drawer. This allows for 90% of calibration work to be performed via laptop without ever touching the cabinetry's facade.
- Identify the Service Envelope: Consult the EAS manufacturer's technical data sheet to determine the minimum clearance required for component removal (usually 12-18 inches of linear space).
- Specify Non-Mechanical Fasteners: Use neodymium magnets or heavy-duty Hook-and-Loop fasteners for access panels to avoid the need for visible screws or latches that signal 'utility access' to shoppers.
- Incorporate Heat Dissipation: Ensure the access cavity includes passive ventilation—such as a 1/4-inch reveal at the top of the panel—to prevent electronics from overheating in confined spaces.
- Document Hidden Points: Include 'As-Built' markers in the architectural set so future facility managers know exactly where to apply pressure to release hidden magnetic panels.
How often do embedded EAS systems require physical access?
Physical access is typically required once during initial commissioning and then every 18–24 months for hardware inspection or if local EMI (Electromagnetic Interference) changes significantly.
Will hidden panels rattle or affect the sensor signal?
If secured with high-pull magnets and rubber gaskets, panels will not vibrate. Ensure the panel material itself is non-metallic to prevent signal attenuation.
Can these panels be made secure from theft?
Yes. Most architects utilize 'blind' security screws or internal locking pins that are only accessible from the secure side of the cabinetry (e.g., behind a locked drawer).
Future-Proofing: From Traditional EAS to Integrated RFID/ESL

Future-proofing flush-mount security means designing cabinetry as a flexible infrastructure that evolves from basic Electronic Article Surveillance (EAS) to a holistic 'Smart Shelf' ecosystem. By embedding wide-band antenna cavities and high-speed data pathways today, architects allow retailers to transition from simple loss prevention to real-time RFID inventory tracking and Electronic Shelf Label (ESL) integration without ever touching a saw or refinishing a surface. This evolution transforms security sensors from a sunk cost into a primary driver of omnichannel efficiency and interactive customer experiences.
| Feature | Traditional EAS | Integrated RFID | Smart ESL/Interactive |
|---|---|---|---|
| Primary Goal | Loss Prevention | Inventory Accuracy | Customer Engagement |
| Data Type | Binary (Alarm/No Alarm) | Item-Level Serialization | Dynamic Pricing/Video |
| Hardware Path | Coax/Shielded Pair | PoE (Power over Ethernet) | Low-Latency Wireless/BLE |
| Architectural Impact | Static Antennas | Zonal Coverage | Power-at-Shelf-Edge |
Expert Tip: The 'Dual-Purpose Plenum' Strategy. When designing the internal voids for EAS antennas, specify a 'Plenum-Plus' clearance of at least 2 inches extra depth. This small adjustment allows for the future insertion of RFID overhead readers or ESL hubs alongside existing EAS electronics, preventing the need for destructive cabinet modifications when the retailer upgrades their digital stack.
- Specify Multi-Protocol Cabling: Install Category 6a (Cat6a) cabling alongside traditional power lines. While EAS may only need power, future RFID and ESL systems require high-bandwidth data for real-time inventory syncing.
- Design for Frequency Transparency: Use non-metallic substrates like high-density polymers or specialized glass-reinforced plastics in the 'active zones.' This ensures the cabinet is compatible with both 8.2MHz EAS and 900MHz RFID frequencies.
- Integrate Power-at-the-Edge: Incorporate low-voltage busbars into shelf standards. This supports future Electronic Shelf Labels (ESL) or integrated LED lighting that reacts to customer proximity sensors.
Can RFID replace EAS entirely in custom cabinetry?
Yes, high-end retailers increasingly use RFID for both inventory and security. Flush-mounting RFID readers in the cabinetry allows for 'invisible' security gates that identify exactly which item is leaving the zone.
How does ESL integration affect cabinet aesthetics?
Modern ESLs are flush-mounted into the shelf edge. When planned early, the tracks for these labels can be recessed into the millwork, maintaining a clean, architecturally significant profile.
What is the ROI of future-proofing security sensors?
By designing for future upgrades, you reduce the 'Total Cost of Ownership' by up to 40%, as future technology swaps only require component replacement rather than full cabinet reconstruction.