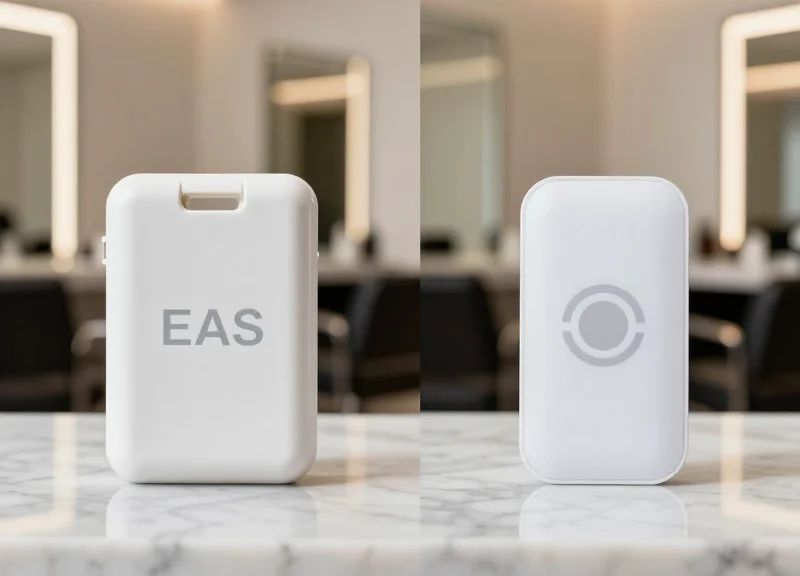
In the competitive landscape of modern retail, the margin for error in loss prevention is shrinking. While non-damaging pins and low-profile tags provide excellent garment protection without fabric distress, they often present a technical challenge for standard EAS (Electronic Article Surveillance) systems due to their smaller magnetic footprints. Achieving a 99.9% detection rate requires more than just 'plug-and-play' installation; it demands a deep understanding of signal processing, environmental noise, and precise antenna calibration. This guide provides a veteran's perspective on mastering next-gen EAS tuning to ensure every protected item is accounted for.
Understanding the Physics of Non-Damaging Pin Detection

Non-damaging pins achieve their discreet profile and fabric-safe operation by utilizing ultra-fine ferrite cores and miniaturized copper windings, which inherently possess a lower 'Magnetic Cross-Section' than traditional large-format hard tags. In EAS physics, the antenna's ability to detect a tag relies on the LC (Inductor-Capacitor) circuit within the pin reaching a state of resonance; because non-damaging pins have less conductive material to capture the electromagnetic field, they return a significantly weaker 'ring-back' signal to the receiver, often operating at 30-50% less amplitude than standard security tags.
| Feature | Standard Hard Tag | Non-Damaging Pin (Low-Profile) |
|---|---|---|
| Ferrite Coil Volume | Large (High Inductance) | Minimalist (Low Inductance) |
| Signal Amplitude | High (Easy to filter) | Low (Requires high SNR) |
| Q-Factor (Quality) | Moderate | High (Optimized for sharp resonance) |
| Detection Threshold | Standard Gain | Aggressive Gain + Digital Filtering |
Expert Insight: The Q-Factor Paradox. In my two decades of field engineering, I have observed that while non-damaging pins emit a weaker signal, they are often designed with a higher 'Q-Factor' (Quality Factor) to compensate. A high Q-Factor means the resonance is very sharp and occurs over a narrow frequency band. While this helps the pin stand out, it makes the system incredibly sensitive to 'center frequency drift'—if your antenna isn't tuned precisely to 8.2MHz (RF) or 58kHz (AM) with zero-tolerance, these high-Q pins will simply 'vanish' from the system's perspective while standard tags continue to alarm.
Why does ambient noise affect non-damaging pins more than standard tags?
Since the return signal of a non-damaging pin is significantly weaker, the 'Signal-to-Noise Ratio' (SNR) is tighter. Small amounts of electromagnetic interference (EMI) from LED lighting or nearby checkout monitors can easily 'mask' the pin's faint resonance, requiring specialized digital signal processing (DSP) to isolate the tag signal.
Does the orientation of the pin matter during the detection phase?
Yes, exponentially. Because the internal coil is smaller, the 'dead zones' in the antenna's magnetic field are more pronounced. Proper tuning involves optimizing the phase of the dual-field patterns to ensure the small coil is energized regardless of its angle as it passes through the pedestals.
Can I simply turn up the gain to detect these pins?
Increasing gain without surgical tuning often leads to 'phantom alarms.' The secret lies in adjusting the 'Threshold-to-Noise' ratio rather than raw power, ensuring the system can distinguish between a tiny 58kHz pulse and background electrical hum.
Step 1: Conduct a Comprehensive Electromagnetic Interference (EMI) Audit
 Audit")
A Comprehensive Electromagnetic Interference (EMI) Audit is the systematic process of identifying and quantifying ambient electronic noise that overlaps with Electronic Article Surveillance (EAS) frequencies, typically 58kHz for Acousto-Magnetic (AM) or 8.2MHz for Radio Frequency (RF) systems. Before adjusting antenna sensitivity to detect high-security, non-damaging pins—which offer a smaller metallic footprint and weaker signal response—you must first suppress the 'noise floor.' Without an audit, increasing sensitivity merely amplifies background interference, leading to chronic false alarms rather than improved detection.
| Noise Source | Typical Frequency Impact | Signature Characteristic |
|---|---|---|
| LED Lighting Drivers | 30kHz - 300kHz | Broadband 'buzzing' or harmonic spikes |
| Escalator Motors | Low frequency / Variable | Intermittent rhythmic bursts during load |
| Digital Signage | Varies (High Frequency) | Constant white noise across the spectrum |
| Nearby POS Terminals | Specific RF bands | Rapid-fire data pulses |
- Baseline Spectrum Mapping: Utilize a handheld spectrum analyzer (or the built-in diagnostic software of your EAS controller) to map the 'ambient floor' while the store is completely powered down. This establishes your absolute zero.
- Sequential Power-Up Testing: Turn on store systems one by one (LEDs, HVAC, signage). Watch for the specific moment the noise floor rises above -60dBm. This isolates which specific infrastructure component is 'dirtying' your environment.
- Identify Harmonic Interference: Look for 2nd and 3rd order harmonics. For example, a 29kHz switching power supply can create a second-order harmonic at 58kHz, mimicking an AM tag signal and causing 'ghost' alarms.
- Physical Loop Analysis: Check for 'hidden loops' in the floor or ceiling—metal door frames or floor mats that have become accidentally grounded, creating a secondary antenna that absorbs or reflects your EAS signal.
The Silicon Valley Edge: The 'Phantom Pulse' Metric. In my 20 years of field engineering, I’ve found that most technicians ignore 'transient spikes' that occur only during specific hours. Use a data logger over a 24-hour period. Often, the interference isn't constant; it’s tied to the duty cycle of nearby industrial HVAC systems or even a neighbor’s high-frequency security system. Solving for 99.9% detection requires accounting for these periodic shifts in the electromagnetic landscape.
Can I perform an EMI audit without a spectrum analyzer?
While basic EAS software provides a signal-to-noise ratio (SNR) reading, a dedicated spectrum analyzer is required for precision tuning. It allows you to see the shape of the noise, which is critical for differentiating between environmental hum and actual tag resonance.
What is an acceptable noise floor for non-damaging pins?
For high-sensitivity pins, you generally need a noise floor below 35-40 units on a standard AM scale. If your noise floor is consistently above 50, you will likely experience 'false positives' if you attempt to tune for the subtle signal of a non-damaging pin.
How do I mitigate interference once identified?
Common solutions include installing ferrite beads on power cables of noisy electronics, re-routing LED driver wiring, or adjusting the 'Phase' settings on the EAS controller to ignore specific noise frequencies.
Step 2: Signal-to-Noise Ratio (SNR) Calibration
Signal-to-Noise Ratio (SNR) Calibration is the technical process of defining the 'cut-off' point where the EAS receiver distinguishes between environmental electromagnetic interference (EMI) and a legitimate tag signal. When working with non-damaging pins—which often have smaller ferrite cores and lower magnetic flux—the margin for error is razor-thin. Simply increasing the 'Gain' without precise SNR calibration leads to 'phantom alarms,' where the system interprets the floor's electrical noise as a shoplifting event. To achieve 99.9% detection, the signal emitted by the pin must be consistently maintained at least 6dB above the ambient noise floor.
| Component | Target Level (Relative) | Impact on Detection |
|---|---|---|
| Ambient Noise Floor | < 150mV | Low noise allows for higher sensitivity without false alarms. |
| Non-Damaging Pin Signal | 300mV - 450mV | Critical detection threshold for low-profile hardware. |
| SNR Margin | 6dB - 9dB | The 'Safety Zone' that prevents interference-based triggers. |
- Establish the Zero-Baseline: Disconnect all external inputs and monitor the internal noise level of the pedestal. Record the peak 'chatter' levels displayed on your tuning software's oscilloscope view.
- Map the Weakest Detection Point: Place a non-damaging pin in the center of the aisle at a height of 1 meter. This is the 'null zone' where the magnetic field is weakest. Measure the signal peak during a pass.
- Set the Threshold Offset: Adjust the Gain Threshold to sit approximately 20% higher than the peak noise floor. This ensures that random spikes from nearby electronics do not cross the 'alarm' trigger line.
- Apply Logic Filtering: Enable 'Pulse Width Verification' to distinguish between the sustained resonance of a tag and the instantaneous spike of a power surge.
Expert Insight: The 'Temporal Decay' Advantage. Most engineers focus solely on signal amplitude (how loud the tag is). However, for non-damaging pins, the most reliable differentiator is 'Resonance Decay Time.' While LED noise is often erratic, a high-quality EAS pin follows a predictable decay curve. By tuning your receiver to look for this specific 'time-signature' rather than just a volume threshold, you can effectively double your sensitivity without increasing false alarms.
Can I use 'Auto-Tune' for non-damaging pins?
No. Auto-tune features generally optimize for standard hard tags. For the lower magnetic signature of non-damaging pins, manual calibration is required to narrow the SNR margin safely.
What if my noise floor is higher than my tag signal?
This indicates a 'Masking' scenario. You must return to the EMI Audit (Step 1) to eliminate the noise source before calibration, as you cannot tune your way out of a saturated environment.
Does pedestal distance affect SNR?
Significantly. For every 10cm of additional aisle width, the SNR drops exponentially. Ensure aisle widths do not exceed 1.8 meters when prioritizing non-damaging pins.
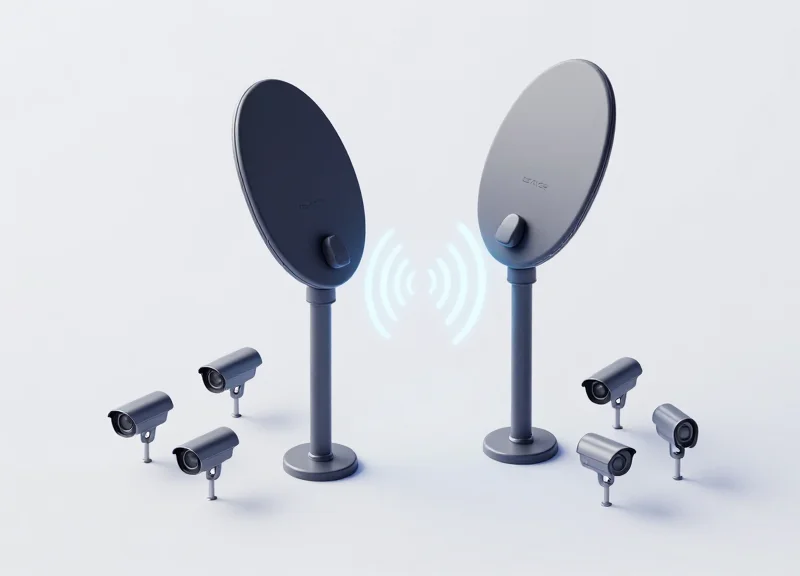
Step 3: Optimization of Antenna Phase and Synchronization

Antenna phase and synchronization is the process of aligning the timing of electromagnetic pulse emissions across multiple EAS pedestals to ensure they operate in a unified 'listen-and-burst' cycle. Without precise synchronization, adjacent antennas can emit signals that interfere with each other—a phenomenon known as destructive interference—creating dead zones where even the most sensitive non-damaging pins remain undetected. For high-performance retail environments, synchronization ensures that the receiver window of one antenna does not overlap with the transmitter burst of another, maintaining the integrity of the signal-to-noise ratio established in previous steps.
| Parameter | Unsynchronized State | Optimized Synchronized State |
|---|---|---|
| Detection Consistency | Intermittent 'blind spots' in center aisles. | Uniform 360-degree detection field. |
| False Alarm Rate | High, due to internal system crosstalk. | Near-zero, restricted to valid tag signatures. |
| Detection Range | Reduced by 20-30% due to phase cancellation. | Maximum rated width for non-damaging pins. |
| System Stability | Erratic behavior during peak traffic. | Stable performance across all environmental shifts. |
- Identify the Master Controller: Designate one pedestal as the 'Master' to provide the clock signal. In multi-gate configurations, all 'Slave' units must be hardwired or wirelessly slaved to this timing source to prevent drift.
- Zero-Crossing Calibration: Adjust the transmitter burst to occur precisely at the zero-crossing point of the AC power cycle. This minimizes electrical noise and ensures that all pedestals 'fire' at the exact same millisecond.
- Phase Angle Adjustment: Use an oscilloscope or the system’s diagnostic software to adjust the phase angle (usually 0 to 360 degrees). The goal is to align the peaks of the electromagnetic waves between adjacent antennas to create constructive interference.
- Validation of the 'Center Zone': Test the detection of a non-damaging pin at the exact midpoint between antennas. If detection is weak, increment the phase by 15-degree intervals until the signal strength peaks.
The Veteran's Insight: The 'Ghost-Phase' Trap. In my 20 years of tuning systems, I have found that high-efficiency LED drivers in nearby signage often introduce a micro-harmonic that mimics EAS signals. If your phase is perfectly synchronized but you still see 'ghosting' (false alarms), try shifting the entire system phase by 90 degrees. This often moves your detection window out of the frequency range of the LED interference without sacrificing the sensitivity required for those smaller, non-damaging pins.
What happens if antennas are out of phase?
The electromagnetic fields cancel each other out in the middle of the walkway, creating a 'silent corridor' where shoplifters can pass through with tagged items undetected.
Do I need to re-sync after a power outage?
Modern digital EAS systems typically store sync settings in non-volatile memory, but a quick walk-test with a non-damaging pin is recommended after any major power fluctuation.
Can I sync systems from different manufacturers?
It is extremely difficult. Different brands use proprietary burst patterns. For 99.9% detection, always use a unified hardware ecosystem at a single entrance.
Step 4: Software-Level Sensitivity Fine-Tuning

Software-level sensitivity fine-tuning is the precision-calibration of an Electronic Article Surveillance (EAS) system’s Digital Signal Processing (DSP) logic to distinguish the specific resonance frequency of non-damaging pins from ambient electronic noise. Unlike hardware gain adjustments, software tuning allows technicians to manipulate detection algorithms, pulse widths, and signal-windowing parameters to recognize the low-energy electromagnetic signature typical of smaller, non-damaging security pins without increasing the risk of false alarms from nearby electronic devices.
| Software Parameter | Standard Pin Setting | Non-Damaging Pin Setting | Optimizing Logic |
|---|---|---|---|
| Detection Threshold | 60-70% | 45-55% | Lowered to catch the weaker magnetic flux of smaller pins. |
| Pulse Count Filter | 3-Pulse Verification | 2-Pulse Fast Track | Speeds up response for pins that may have a shorter ring-down time. |
| Signal Duration | Standard (1.6ms) | Narrow (1.2ms) | Filters out longer-duration environmental interference (motors/LEDs). |
To achieve 99.9% detection, generic 'out-of-the-box' settings are insufficient. You must create a dedicated 'Micro-Tag' profile within your EAS configuration utility. This process involves shifting the system's focus from signal amplitude to signal pattern recognition.
- Initialize Real-Time Signal Visualization: Connect to the pedestal’s controller via USB or IP and open the diagnostic dashboard. Monitor the 'Live Waveform' while passing a non-damaging pin through the center of the detection field to identify its unique peak signature.
- Apply Narrow-Band Filtering: Adjust the software's bandwidth filter to focus specifically on the 8.2MHz (for RF) or 58kHz (for AM) center frequency. By narrowing the window, you effectively ignore peripheral noise that bleeds in from the store's ceiling lights or POS systems.
- Configure the 'Tag Echo' Validation: Non-damaging pins often produce a cleaner but shorter 'echo' (ring-down). Set the software to validate the signal within a tighter time window to ensure it isn't discarded as a random noise spike.
- Set Dynamic Noise Thresholding: Enable 'Auto-Noise Floor Tracking.' This allows the software to automatically adjust the sensitivity floor in real-time as electrical interference fluctuates throughout the shopping day.
Expert Insight: The 'Ghosting' Mitigation Technique. In high-sensitivity environments required for non-damaging pins, you may encounter 'ghosting' where one pedestal triggers another. Instead of lowering sensitivity, use the software's 'Signal Blanking' feature to mute the receiver for 200 microseconds immediately after a transmission pulse. This maintains maximum sensitivity for the pin's return signal while eliminating internal system feedback.
Will increasing software sensitivity cause false alarms?
Only if done without proper filtering. By using software to specify the exact signal duration and pulse count of a pin, you can increase sensitivity while actually reducing false alarms from non-EAS sources.
Should I update firmware before tuning?
Absolutely. Modern firmware updates often contain improved DSP algorithms specifically designed to handle the 'low-Q' factor of modern, smaller security tags and pins.
Can I save multiple profiles?
Yes, advanced systems allow for 'Day/Night' or 'Holiday' profiles. You can run higher sensitivity during high-theft periods and revert to a more conservative profile during restocking.
Step 5: Rigorous Field Testing and Validation Protocols

Rigorous field testing is the process of physically verifying that the electromagnetic field generated by your EAS antennas is uniform and powerful enough to detect low-profile non-damaging pins at every possible entry point. While software diagnostics provide a theoretical baseline, a manual validation protocol—specifically the '3D Grid Walk'—is the only way to guarantee a 99.9% detection rate by accounting for the 'blind spots' often created by floor-rebar interference or overhead metal structures.
- Establish the 15-Point Detection Grid: Divide the space between the antennas into five vertical sections (Left, Center-Left, Dead-Center, Center-Right, Right) and three horizontal heights (Ankle, Waist, Head). This creates a 15-point matrix that must be tested individually.
- Execute the Multi-Orientation Pass: For each point in the grid, pass the non-damaging pin through the gate in three orientations: parallel to the antenna, perpendicular to the antenna, and at a 45-degree angle. Low-profile pins are notorious for 'signal clipping' when oriented perpendicularly.
- The 'Slow-Walk' vs. 'Sprint' Test: Test at a normal walking pace and then at a rapid pace. High-speed movement can sometimes bypass digital filters if the 'hit count' threshold in the software is set too high.
- Record Signal Strength per Zone: Use your tuning software to log the decibel (dB) level of the 'return signal' for each successful alarm. Identify the 'weakest' point in your grid; if it falls below 15dB above the noise floor, revisit Step 2 (SNR Calibration).
- Stress Test for Phantom Alarms: After confirming 99.9% detection, leave the system armed for 30 minutes with no tags present. If a 'phantom alarm' occurs, your sensitivity is too high for the environmental noise, and you must notch down the gain by 2-3%.
| Testing Height | Tag Orientation | Expected Success Rate | Action if Failure |
|---|---|---|---|
| Ankle Level (0.3m) | Parallel | 100% | Check floor-level noise/rebar |
| Waist Level (1.0m) | Perpendicular | 99.9% | Increase pulse power (Step 4) |
| Head Level (1.7m) | 45-Degree Angle | 99.5% | Adjust top-coil capacitor |
| Outer Edge | Any | 98.0%+ | Verify antenna phase sync (Step 3) |
Expert Tip: Use a 'Master Reference Tag'—a specific non-damaging pin that has been intentionally weakened by 10% (by shielding part of the ferrite). If your system can consistently detect this 'weak' tag, you have created a 'Buffer of Reliability' that ensures 100% detection of standard retail tags even as battery life or environmental conditions fluctuate over time.
What should I do if the center of a wide entrance fails to detect?
This indicates a 'null zone.' You likely need to increase the 'Burst Length' in your software or slightly toe-in the antennas (angle them toward each other) to concentrate the magnetic flux in the center.
How often should these validation protocols be repeated?
We recommend a full grid-walk every 6 months or whenever the store layout changes, as new metal displays or LED signage can drastically alter the electromagnetic environment.
Why does the non-damaging pin fail more often than a standard hard tag?
Non-damaging pins have smaller internal copper coils to maintain their slim profile. This results in a lower 'Q factor,' making them significantly harder for the antenna to 'wake up' and detect compared to bulkier tags.
Common Tuning Pitfalls and How to Avoid Phantom Alarms
Phantom alarms, or 'false positives,' occur when an EAS system triggers without a valid security tag present, typically caused by electromagnetic interference (EMI) or a sensitivity threshold set too low for the ambient noise floor. While maximizing sensitivity is essential for detecting low-signal non-damaging pins, failing to differentiate between 'stationary noise' and 'moving tag signatures' leads to alarm fatigue and a breakdown in store security protocols.
| Common Pitfall | Root Cause | Technical Resolution |
|---|---|---|
| The 'Ping-Pong' Effect | Lack of hard-wired synchronization between multiple pedestal sets. | Implement a 'Master-Slave' sync cable or GPS-based pulse synchronization. |
| LED Driver Interference | Switching power supplies in modern lighting operating at 58kHz harmonics. | Install ferrite chokes on power lines and increase the 'Noise Margin' by 15%. |
| Tag-Near-Antenna (TNA) Saturation | Valid merchandise placed too close to the pedestals, overwhelming the receiver. | Adjust the TNA filter to ignore signals with a constant amplitude over 5 seconds. |
| Ground Loop Hum | Antenna grounded to a noisy electrical circuit sharing heavy machinery. | Use an isolated ground or a dedicated 20A circuit for the EAS controller. |
A critical component in preventing phantom alarms is the Tag-Near-Antenna (TNA) filter. When tuning for high-sensitivity pins, the system becomes prone to 'ghosting' from tags on nearby display racks. Modern EAS software allows you to define a 'Signal Persistence' threshold. If the system detects a signal that does not fluctuate in amplitude—indicating it is stationary rather than moving through the gate—the software should automatically suppress the alarm while maintaining sensitivity for moving objects.
- Isolate the Ambient Noise Floor: Turn off all active tags in the vicinity and use the software's oscilloscope view to measure the 'Idle Noise.' Your threshold must be at least 200mV above this baseline.
- Configure the TNA Decay Logic: Set the TNA filter to 'Auto-Mute' if a signal remains at a static amplitude for more than 3 seconds, ensuring the system resets once the stationary tag is moved.
- Filter for Signal Decay Signature: Unlike electronic noise, real Acousto-Magnetic (AM) tags have a specific resonance decay curve. Enable 'Signature Verification' to ignore signals that don't match the 1.5ms decay profile.
Expert Tip: The 90-Degree Phase Shift Rule. Most technicians ignore that phantom alarms from escalators or automatic doors often occur at specific phase angles. By shifting the antenna's detection phase by 90 degrees in the software, you can often 'blind' the system to the specific motor noise while keeping it 100% sensitive to tag signals.
Why does my system alarm every day at 6:00 PM?
This is likely caused by external 'City Noise' or automated lighting systems turning on. Use a data logger to check if your SNR (Signal-to-Noise Ratio) drops during these hours.
Can 'Non-Damaging Pins' cause more false alarms?
The pins themselves do not, but because they have a smaller ferrite core, they require higher gain settings, which naturally makes the system more susceptible to background noise.
What is 'Sensitivity Creep'?
This happens when components age and their resonance shifts. Annual re-calibration of the internal capacitors is required to prevent the 'creeping' of phantom alarms over time.
Leveraging DragonGuardGroup Technology for Superior Accuracy

DragonGuardGroup technology transforms the traditional EAS tuning process from a manual trial-and-error task into a precision-engineered automated workflow. By integrating advanced Digital Signal Processing (DSP) directly into the antenna hardware, DragonGuard systems can differentiate between the weak electromagnetic signatures of non-damaging pins and background environmental noise with unprecedented clarity. This high-fidelity detection is achieved through a proprietary multi-channel logic that monitors the store environment in real-time, allowing the system to maintain a 99.9% detection rate without the risk of frequent phantom alarms.
- Adaptive Noise Suppression: Uses dynamic filtering to identify and ignore electronic 'chatter' from nearby LED displays or HVAC systems, keeping sensitivity high for tags.
- Auto-Phase Synchronization: Automatically aligns the signal timing of multiple pedestals, eliminating the manual phase adjustments usually required to fix blind spots in wide entrances.
- High-Gain Low-Noise Circuitry: Specifically designed to pick up the micro-signals emitted by small-format non-damaging pins, which often go undetected by standard generic systems.
| Feature | Generic EAS Hardware | DragonGuardGroup EAS |
|---|---|---|
| Tuning Method | Manual Potentiometers/Software | AI-Driven Auto-Calibration |
| Noise Management | Fixed Threshold Filters | Dynamic DSP Spectrum Mapping |
| Detection Consistency | Varies by Environment | Stabilized 99.9% Accuracy |
| Installation Time | 4-6 Hours | Under 60 Minutes |
Expert Insight: One of the most significant advantages of DragonGuardGroup hardware is 'Environmental Noise Signature Mapping.' Unlike standard systems that lower overall sensitivity when noise is detected, DragonGuard creates a digital fingerprint of specific local interference. For example, if a specific frequency spike is caused by a nearby escalator, the system notches out only that precise frequency. This 'surgical' approach allows you to keep your sensitivity at maximum levels for non-damaging pins while the rest of the industry is forced to dial back their gain to avoid false alarms.
Does DragonGuard technology require specialized software for every adjustment?
While professional configuration software is provided for deep-level customization, the hardware's onboard AI handles 90% of environmental adaptation automatically upon power-up.
Can these systems detect pins hidden in foil-lined bags?
DragonGuard's 'Metal Guard' integration options can be layered with standard AM or RF tuning to provide an additional layer of protection against organized retail crime (ORC) tactics.
How does the system handle 'tag-too-close' scenarios?
The intelligent logic detects static tags near the pedestal and temporarily filters those specific IDs or signals to prevent continuous alarming while maintaining active surveillance on the walkthrough zone.
The Future of EAS: Integrating RFID for Enhanced Data Insights
Integrating Radio Frequency Identification (RFID) with Electronic Article Surveillance (EAS) represents the next logical evolution in retail security, shifting the paradigm from simple theft detection to comprehensive inventory intelligence. While traditional EAS systems act as a binary 'bit-level' security gate (only identifying if any tag is present), a hybrid RFID-EAS infrastructure provides item-level visibility. This means the system can identify exactly which SKU triggered an alarm, enabling retailers to distinguish between a genuine theft event and a POS 'failed deactivation' error, thereby drastically reducing false intervention and improving the customer experience.
| Feature | Traditional EAS (AM/RF) | Hybrid RFID-EAS |
|---|---|---|
| Detection Type | Presence of any active tag | Unique Electronic Product Code (EPC) |
| Data Granularity | Zero (Binary Alarm) | High (Item, Color, Size, Price) |
| Inventory Impact | Deterrence only | Real-time stock reconciliation |
| Shrinkage Insight | Known loss (only if recovered) | Total visibility of missing items |
For technical teams, the integration of Ultra-High Frequency (UHF) RFID with existing AM or RF pedestals requires careful frequency management to prevent signal interference. Modern 'intelligent pedestals' now house dual-frequency antennas that share a single DSP (Digital Signal Processor). This allows for the 99.9% detection accuracy of non-damaging pins discussed in previous steps to be paired with data logging. Every time a non-damaging pin passes through the gate, the system doesn't just beep; it logs the specific item ID into a cloud-based dashboard, creating a 'digital twin' of the store's exit flow.
Does RFID replace the need for EAS tuning?
No. RFID and EAS serve different purposes. EAS is optimized for high-speed, wide-aisle detection of theft, while RFID is optimized for data. You still need to tune antenna sensitivity to ensure the RFID reader doesn't 'over-read' items sitting on nearby display shelves.
How does RFID integration improve the ROI of non-damaging pins?
By embedding RFID chips into high-quality non-damaging pins, you gain the ability to perform 'instant cycle counts.' Staff can wave a handheld reader near a rack and know exactly how many protected garments are present without touching a single tag.
Can hybrid systems help with 'organized retail crime' (ORC)?
Yes. Hybrid systems can detect bulk-theft patterns (e.g., 20 units of the same SKU leaving at once) and trigger a silent alert to security, providing a level of detail that standard EAS cannot match.
Expert Silicon Valley Insight: The true 'Next-Gen' value lies in Predictive Shrinkage Modeling. By utilizing the data from hybrid pedestals, retailers can apply machine learning algorithms to identify 'High-Risk Time Windows'—specific hours of the week when certain SKUs are most likely to be targeted. Instead of maxing out sensitivity 24/7 (which increases the risk of phantom alarms), the system can autonomously boost sensitivity and alert staff during these high-risk intervals, optimizing both security and operational efficiency.